The Last Crusade - Level 6: Temple of the Grail
True Adventurer: 80,000 studs |
Area 1: Temple Entrance
(Click any of the screenshots below to enlarge.)
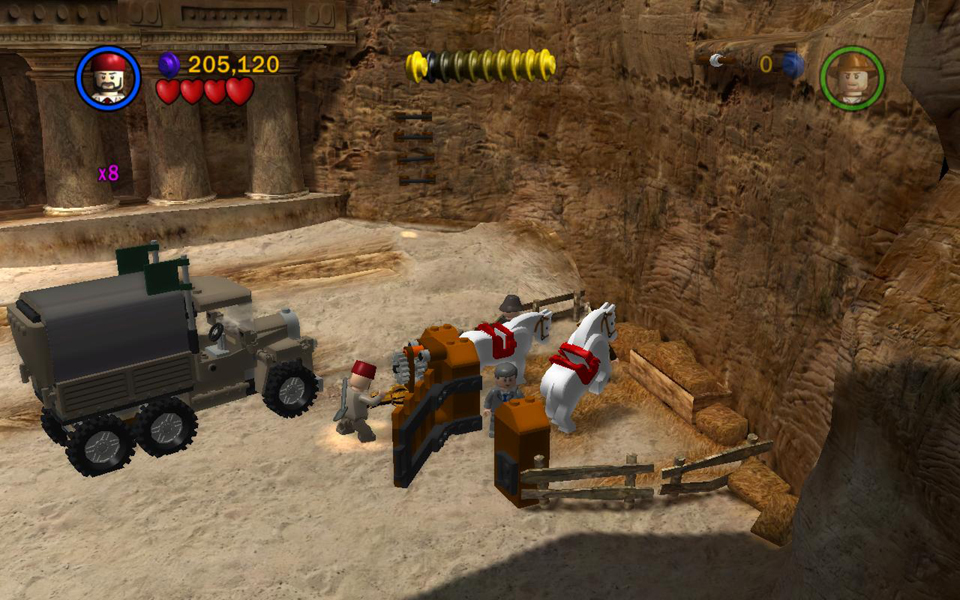
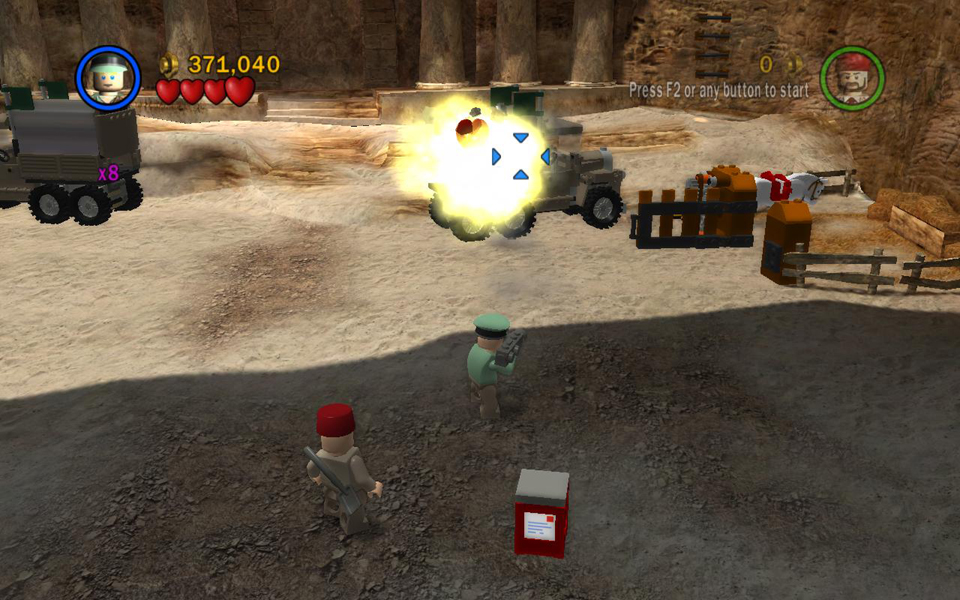
You begin with all four Story Mode characters. The enemy soldiers standing near the trucks notice you right away and attack. As you fight them, try to get closer to the trucks. Knock down the poles holding open the flaps on the back the trucks. This will prevent more soldiers from coming out so you can explore without interference.
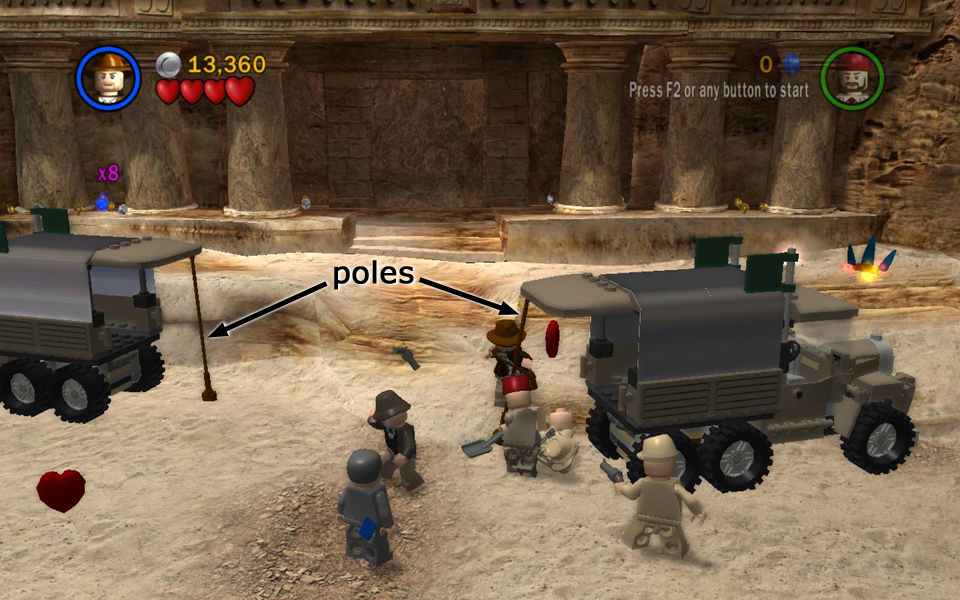 Knock down the poles holding open the trucks' back doors. |
Use Sallah to dig a statue out of the sparkling patch of earth to the right of the temple door. Smash the statue and use the leftover LEGO bits to build a ladder.
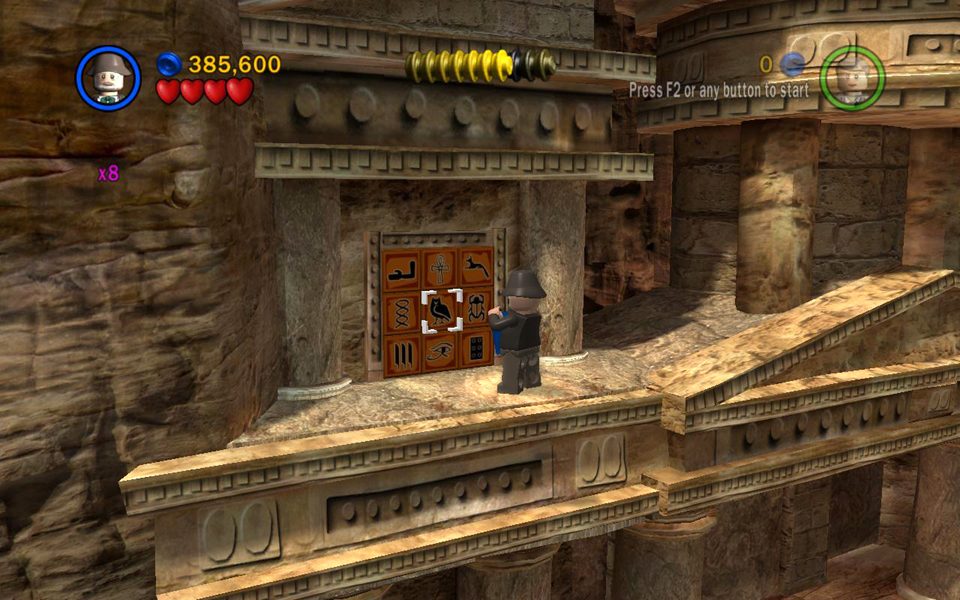
Now have Jones Sr. or Brody climb the ladder and handholds to reach the dangling rope. Swing to the left and jump onto the ledge near the hieroglyph puzzle. Solve the puzzle to raise the center section of the roof so your character can cross over to the second glyph puzzle. Solve this puzzle to reveal a pair of levers down below. Pull them to open the temple entrance.
 Dig up the statue on the right side of the temple. |
 Smash it and use the bits to build a ladder. |
|
 Have Brody or Jones Sr. climb the ladder and handrails. |
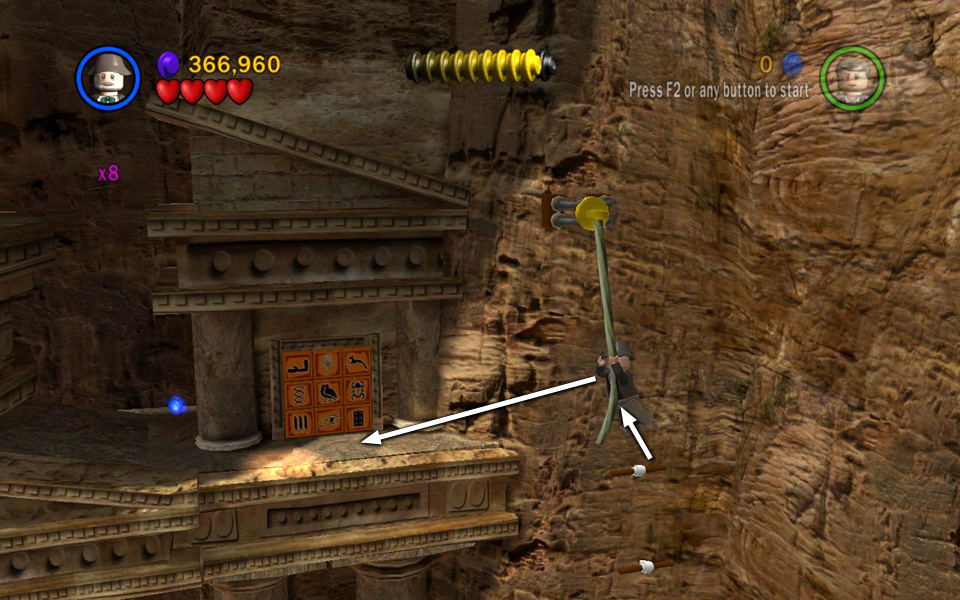 Then use the rope to swing over to the roof. |
|
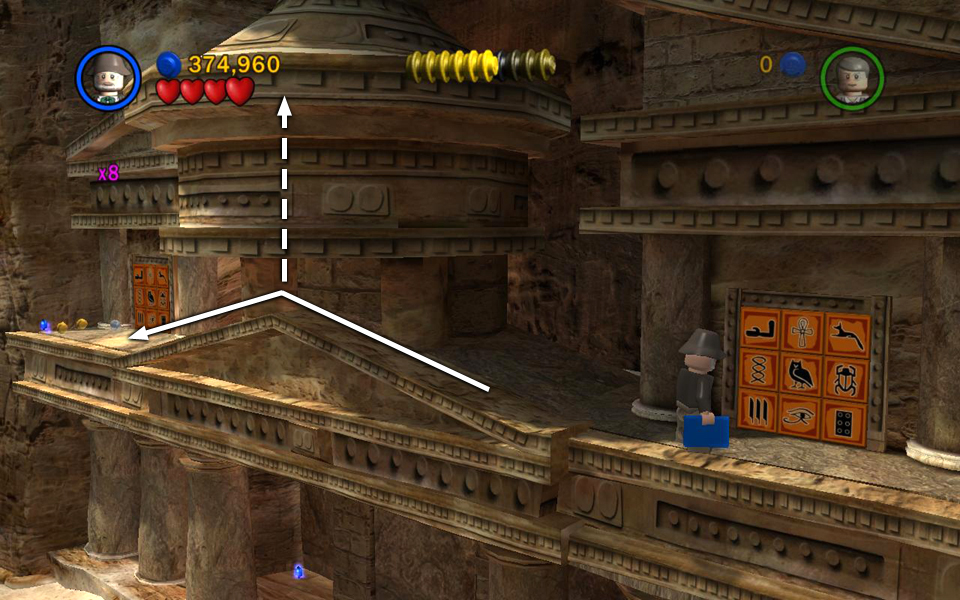 Solve the glyph puzzle to raise the dome. Then cross the roof beneath it. |
 Solve the puzzle on the left to reveal levers below. |
|
 Pull the levers to open the temple door. |
||
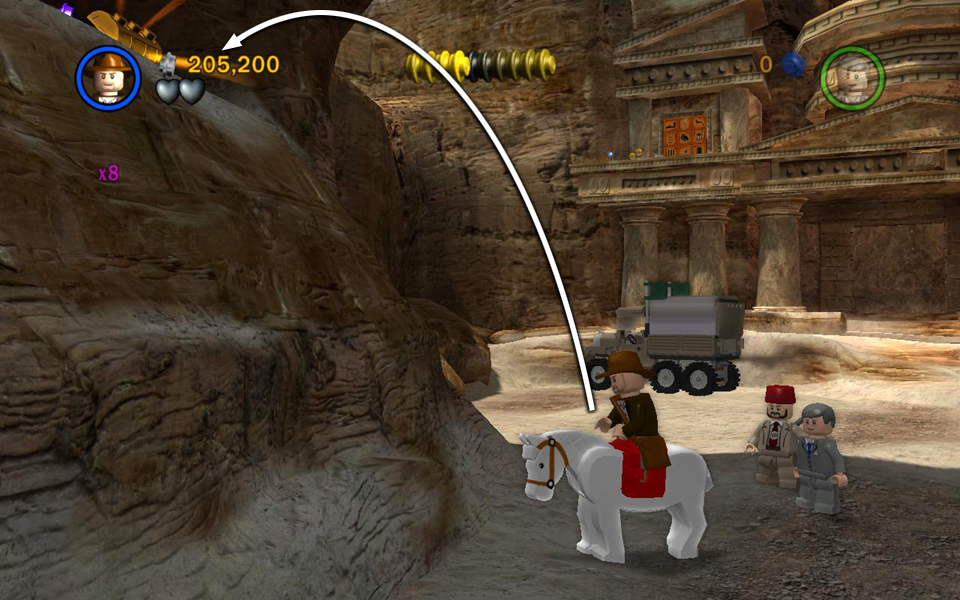
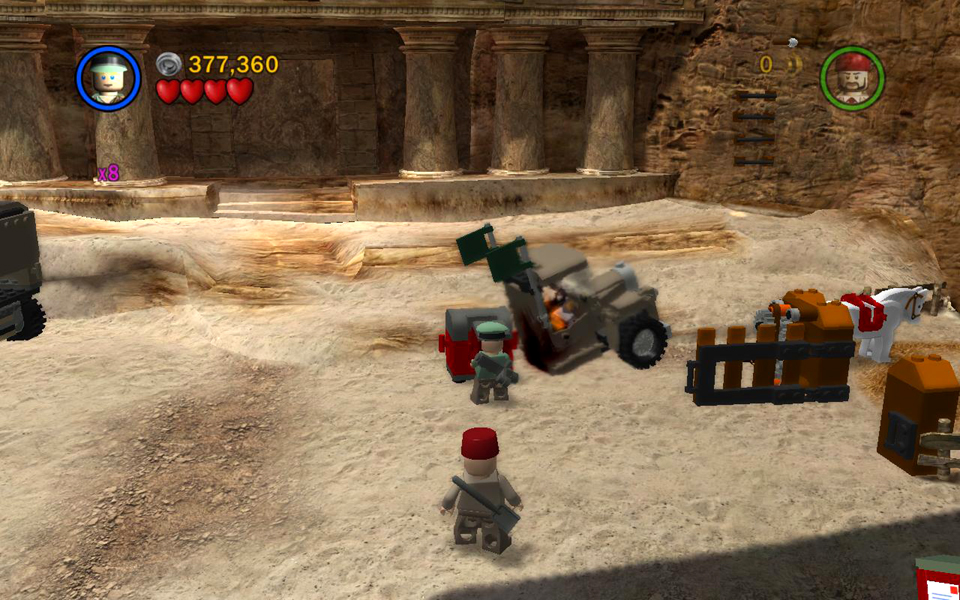
Before going inside, you can go after a few more goodies if you like. Start by jumping over the fence into the horse pen on the right. Mount one of the horses and then press Jump to make the horse buck your character into the air. Catch the handrail on the right and pull up into a little alcove, where you'll find a golden key and a purple stud.
Grab the key, jump down and use the key to open the corral gate. Now ride one of the horses to the left side of the canyon. From below you can just glimpse artifact piece #1 on the ledge above. Position the horse beneath it and press Jump to make the horse launch your character onto the ledge. Grab the treasure chest and 2 purple studs.
When you've finished here, enter the temple.
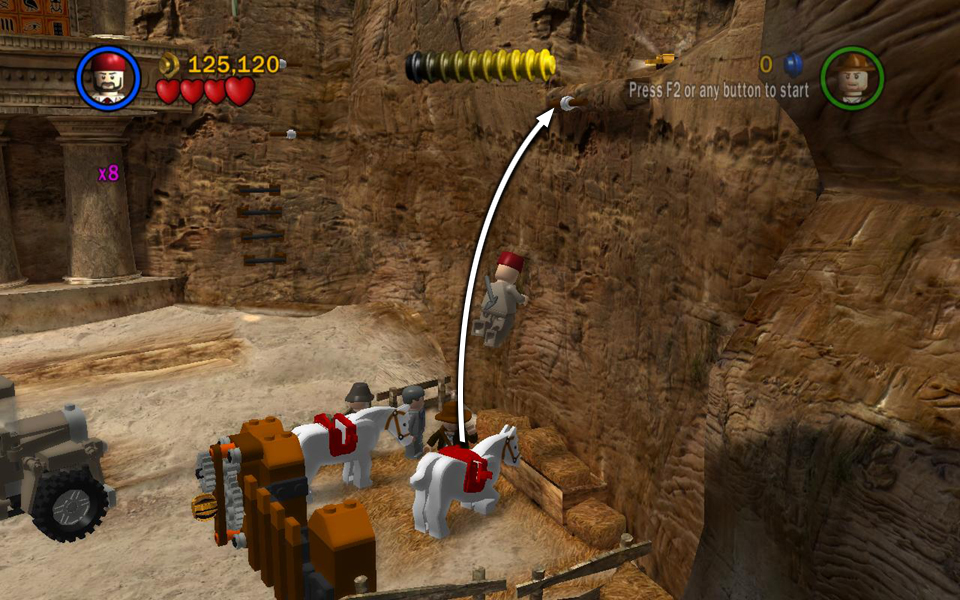 Jump from horseback to the alcove above the corral. |
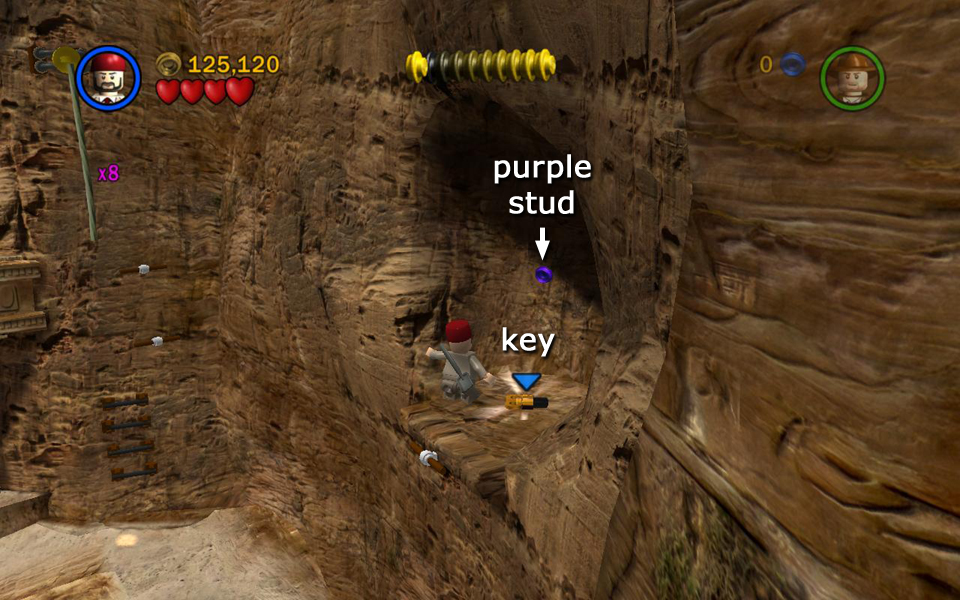 Inside you'll find a key and a purple stud. |
|
 Use the key to crank open the corral gate. |
 Use a horse to reach the high ledge on the left. |
|
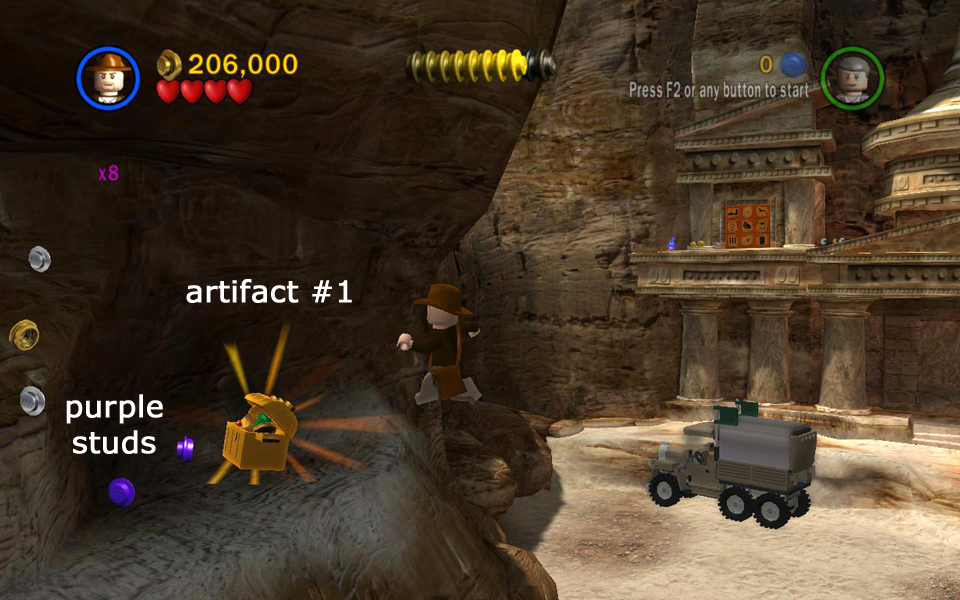 Here you'll find more purple studs and artifact piece (1/10). |
||
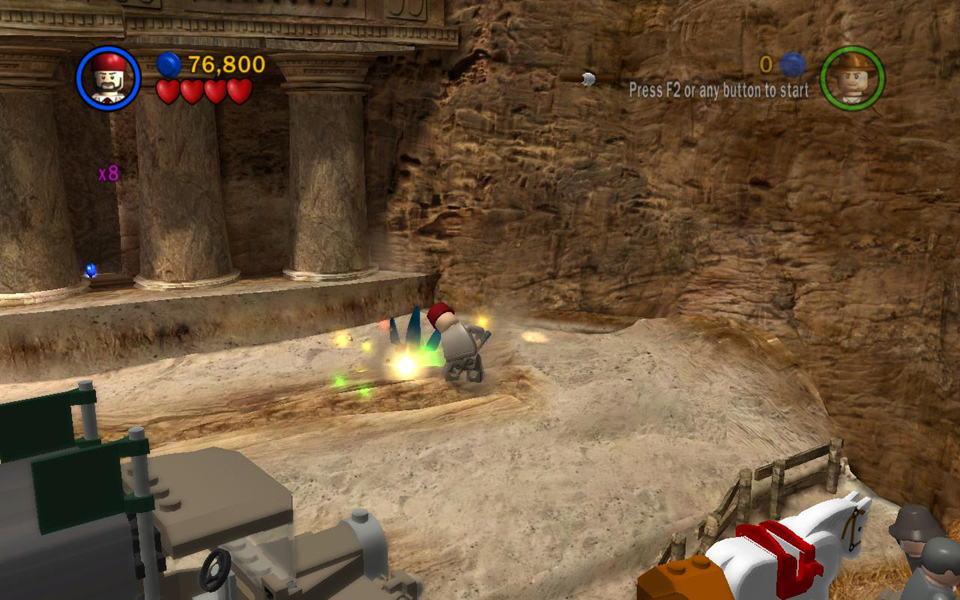
PARCEL: In Free Play, use a character with the excavation ability to dig up the parcel, which is buried in the foreground on the left. Switch to someone with explosives and blow up the truck on the right to reveal the mailbox. Send the parcel home and then proceed into the temple.
Later, when you return to Barnett College, you can purchase the "Invincibility" Extra for 1,000,000 studs. (See Parcels & Extras for more info.)
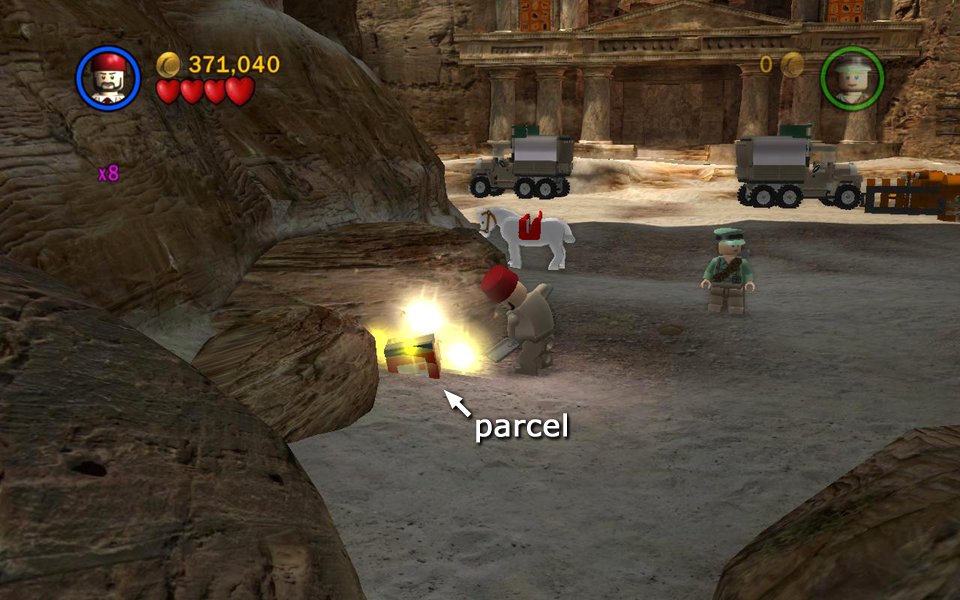 Dig up the parcel in the left foreground. |
 Use explosives to destroy the truck on the right. |
|
 Use the mailbox left in the wreckage to send the parcel home. |
||
Area 2: Grail Temple Anteroom [jump to top]
(Click any of the screenshots below to enlarge.)
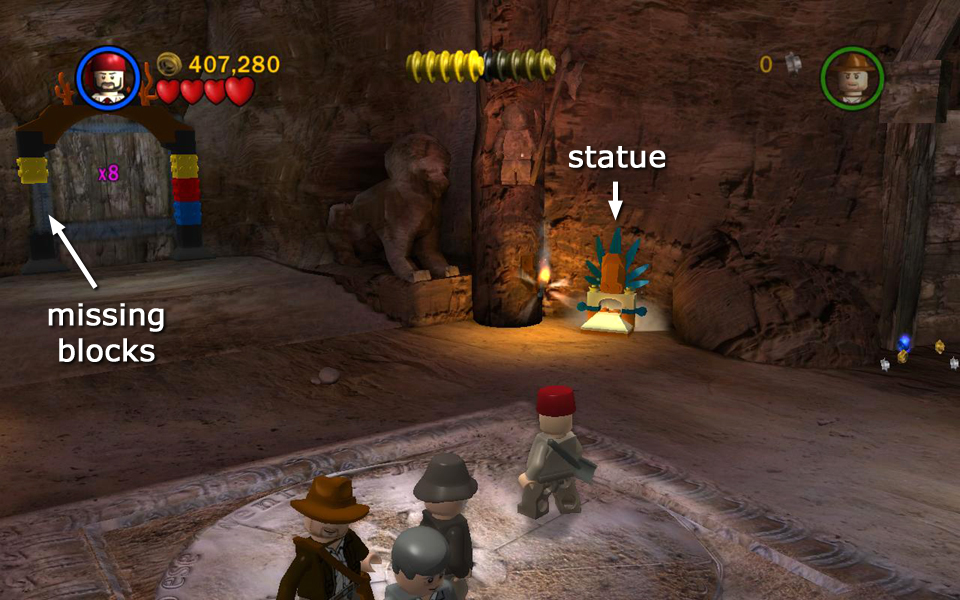
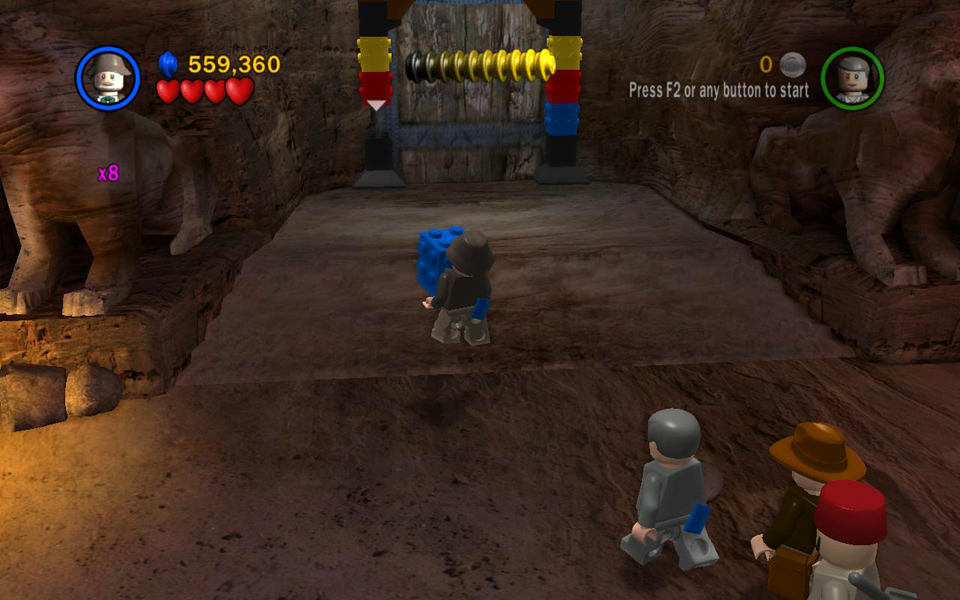
In order to gain entrance to the inner areas of the temple, you must find 2 LEGO blocks and add them to the colorful column next to the door on the left.
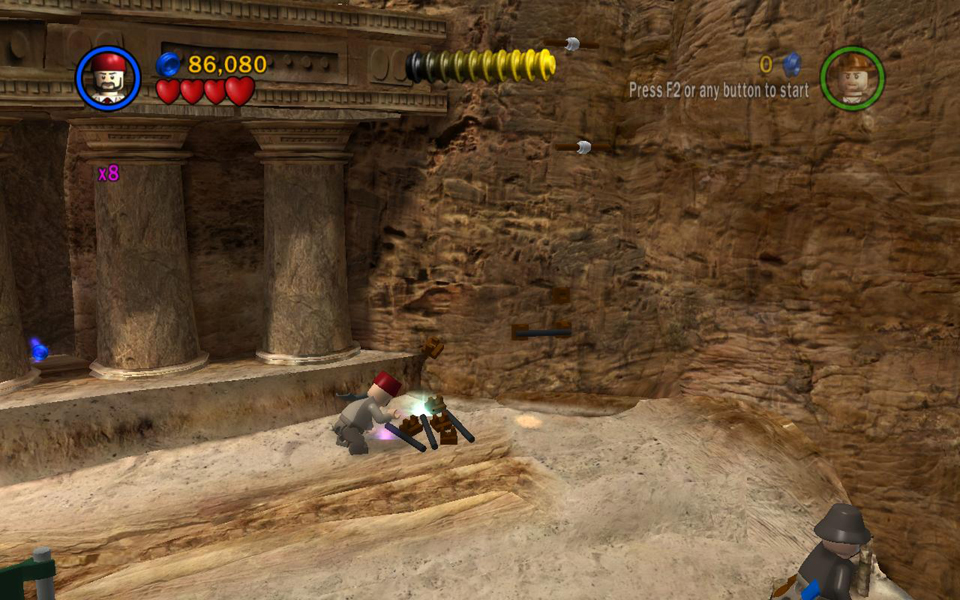
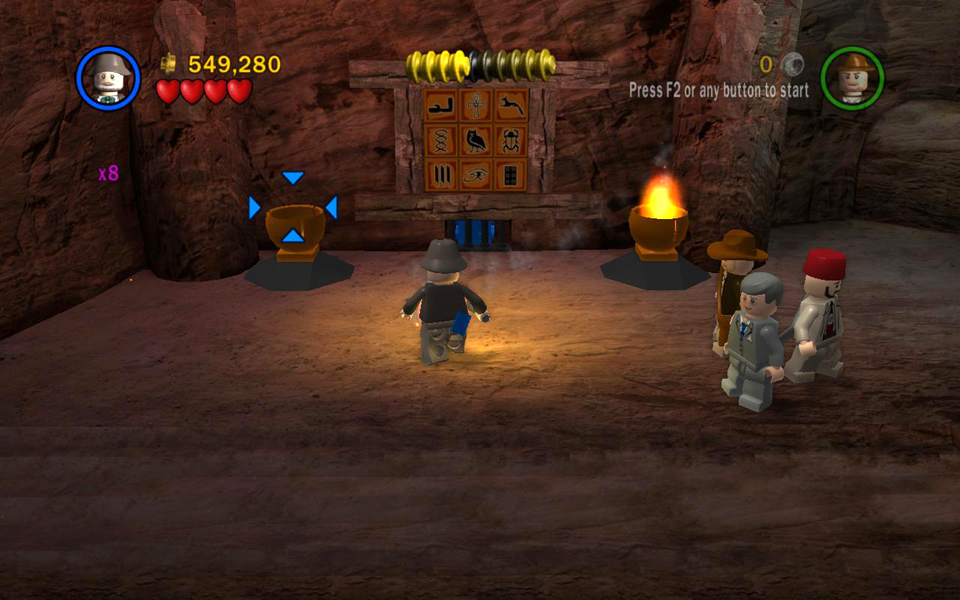
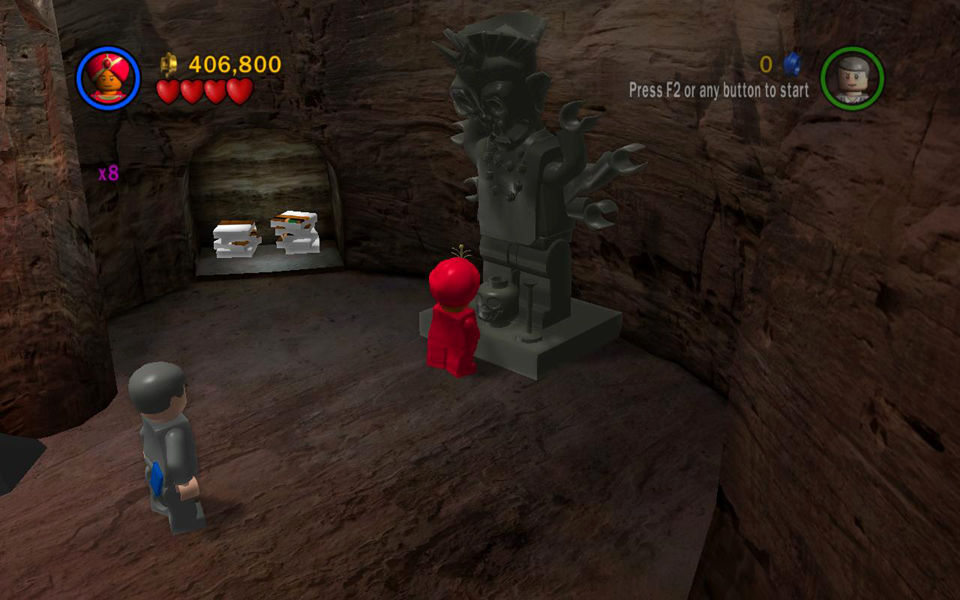
Begin by smashing the statues with the blue feather headdresses. Both yield studs, but the one on the left has something buried beneath it. Have Sallah dig there to unearth a red block. Carry it up the ramp on the left and place it beside the door where it belongs.
 Smash the statue in the corner near the exit. |
 Dig where the statue was to unearth a red block. |
|
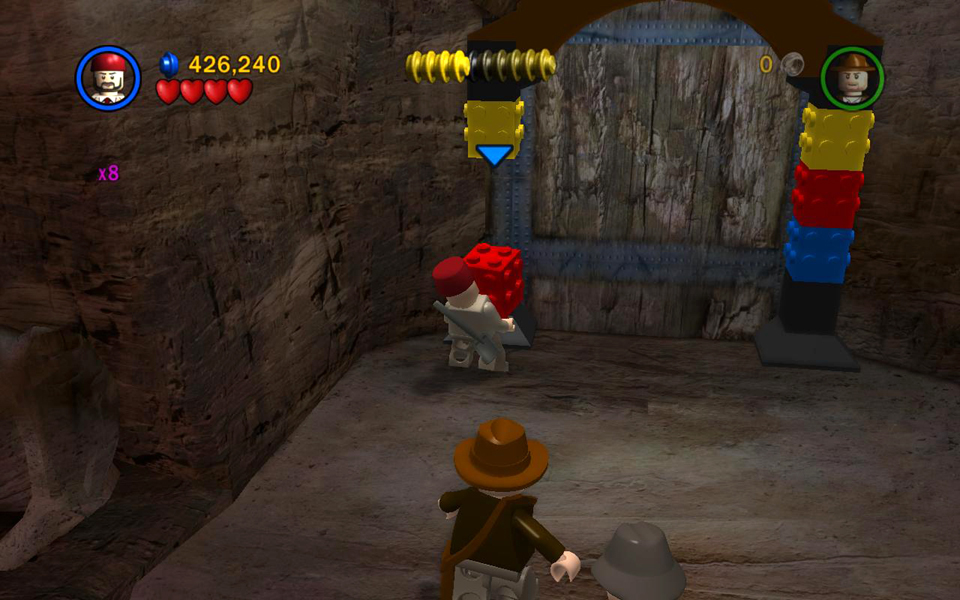 Add it to the column beside the exit. |
||
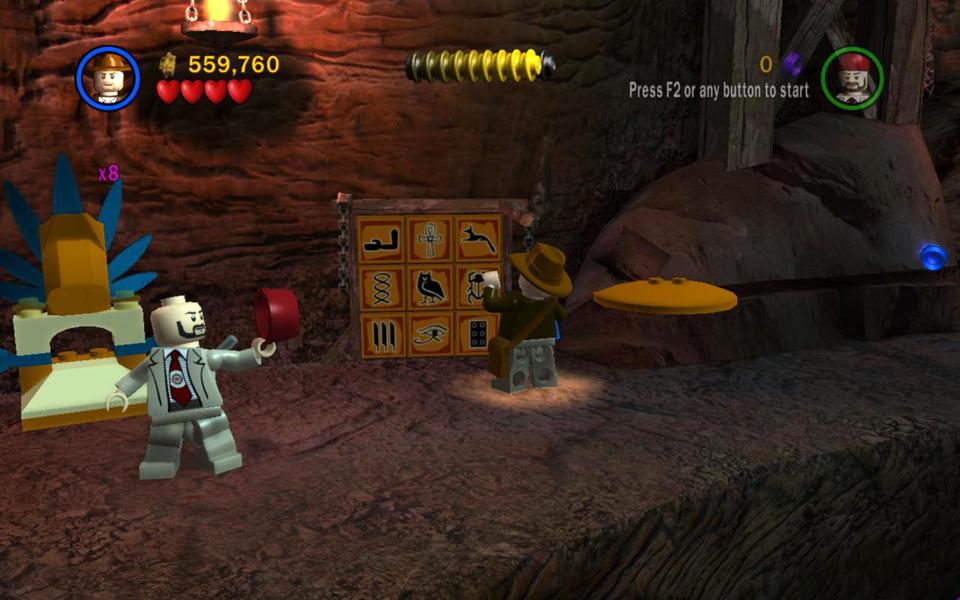
Grab the burning torch from the sconce near where you dug up the red block. Carry it into the room on the right, where you'll find a purple stud (worth 10,000) and various others. Use the torch to light the brazier to the left of the hieroglyph puzzle. This activates the puzzle so you can use it. Solve the puzzle to obtain a blue block and carry it back to the doorway on the left. Put it in its proper place to trigger the next cut scene and enter the next area.
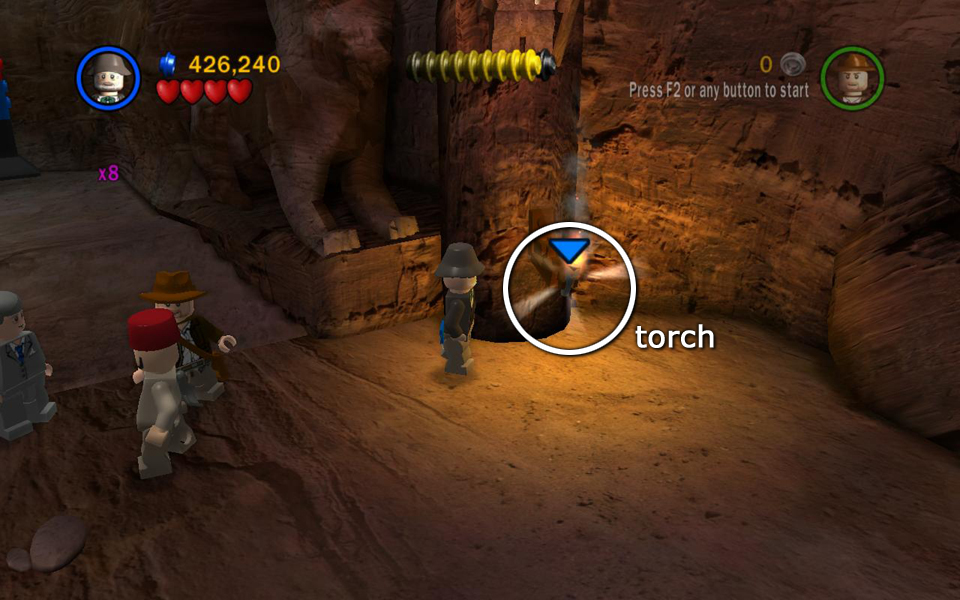 Grab the burning torch near where you just dug. |
 Use it to light the brazier in the next room. |
|
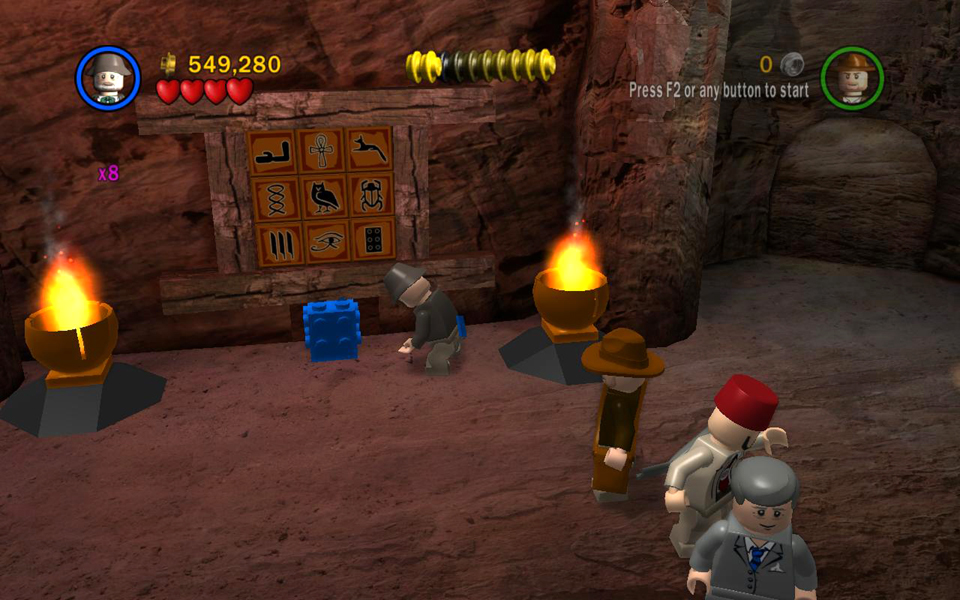 Solve the glyph puzzle to get a blue block. |
 Add the block to the column near the exit to open the door. |
FREE PLAY: Be sure to do this before using the blue block to open the exit. Placing the blue block takes you to the next area and you can't get back here from there.
In the room with the hieroglyph puzzle, use a Thuggee character to activate the Kali statue on the right. This opens a secret panel nearby. Use the tiles inside to create a mural of a treasure chest. Then smash the picture to get the actual chest—artifact piece #2.
 Activate the Kali statue to open a secret panel. |
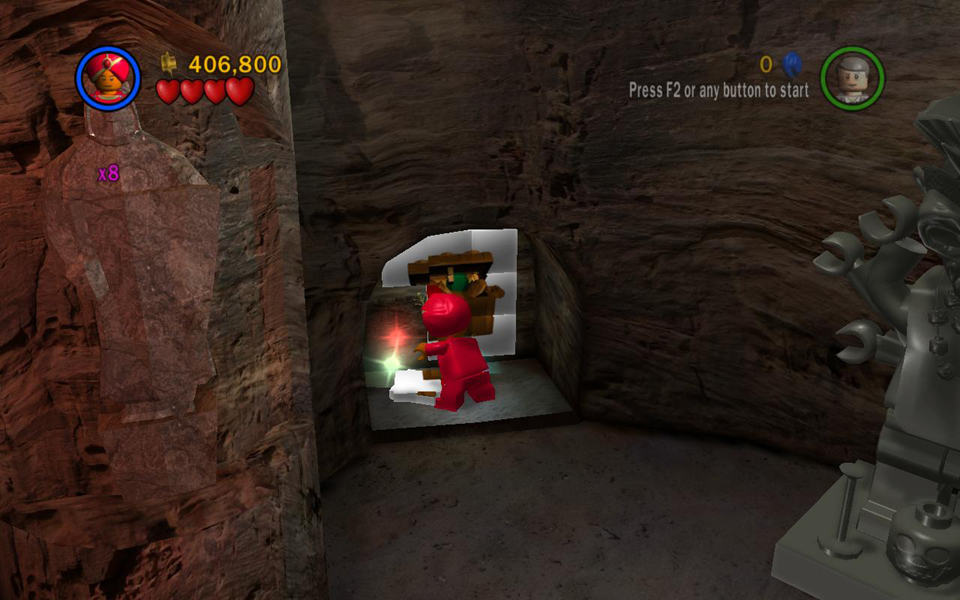 Use the tiles inside to build a mural. |
|
 Smash it to get artifact piece (2/10). |
||
Area 3: Trapped Cavern [jump to top]
(Click any of the screenshots below to enlarge.)
The real Grail trials begin here. During the cut scene between areas, Henry Jones is injured and Brody stays behind to care for him. You now control just Indy and Sallah. Indy now has his father's notebook, however, so he can use the academic ability.
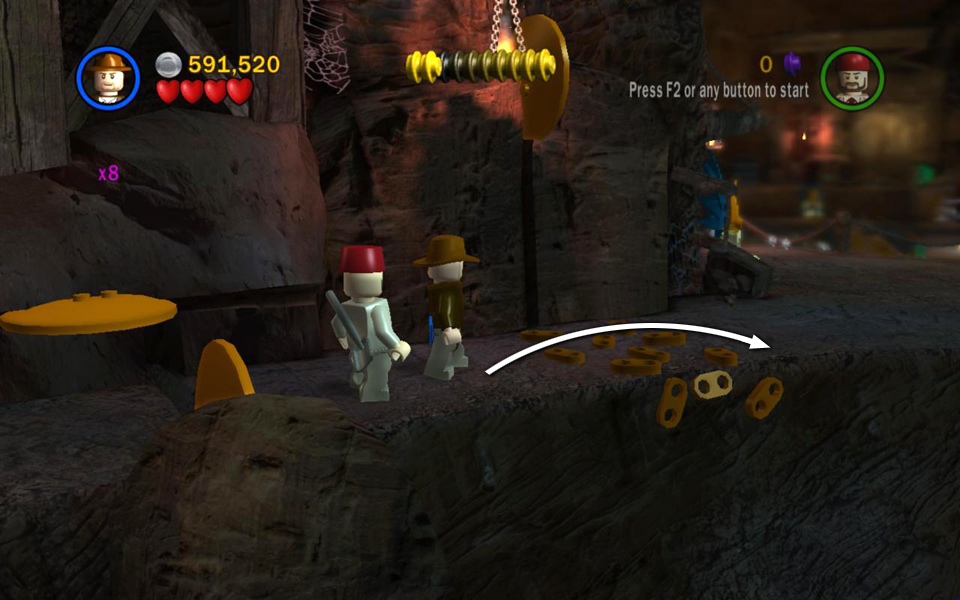
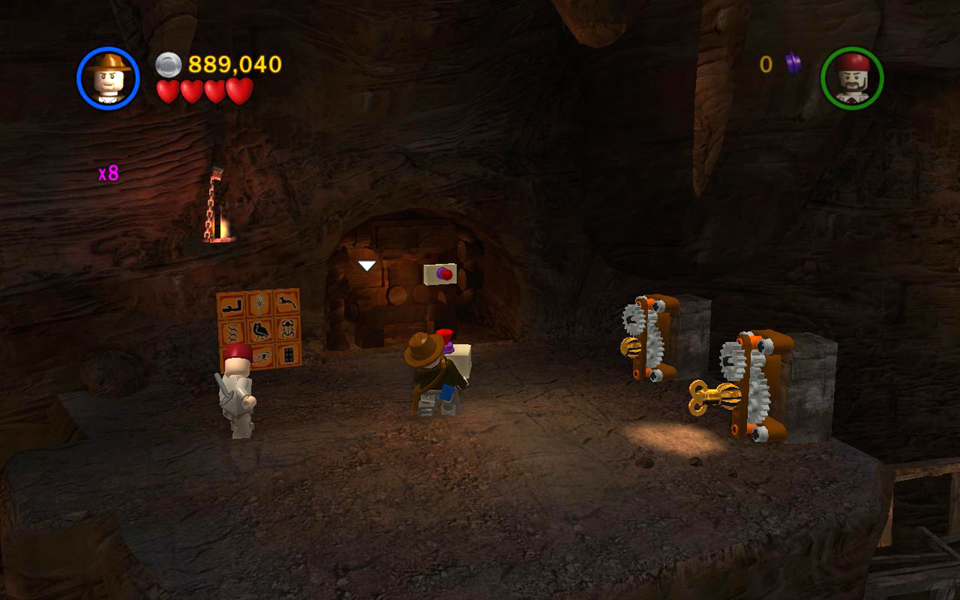
Solve the hieroglyph puzzle just beyond the entrance. This doesn't disarm the blade and spear traps ahead, but it does start them moving so you can make your way past them. Move along the outside edge of the path to avoid the first blade. (Take care not to fall off the edge.) Then either jump over or run past the second blade as it retracts into the wall. Then wait for the spikes to retract before running or jumping past them. If you move along the outer edge of the path, you shouldn't have any trouble avoiding both the blade and spikes.
 Solve the glyph puzzle to activate the traps while Sallah sings a little Gilbert & Sullivan. ;) |
 Stand near the outer edge of the path and jump over the second blade when it retracts. |
|
 Wait for the spikes to retract and jump past them. |
||
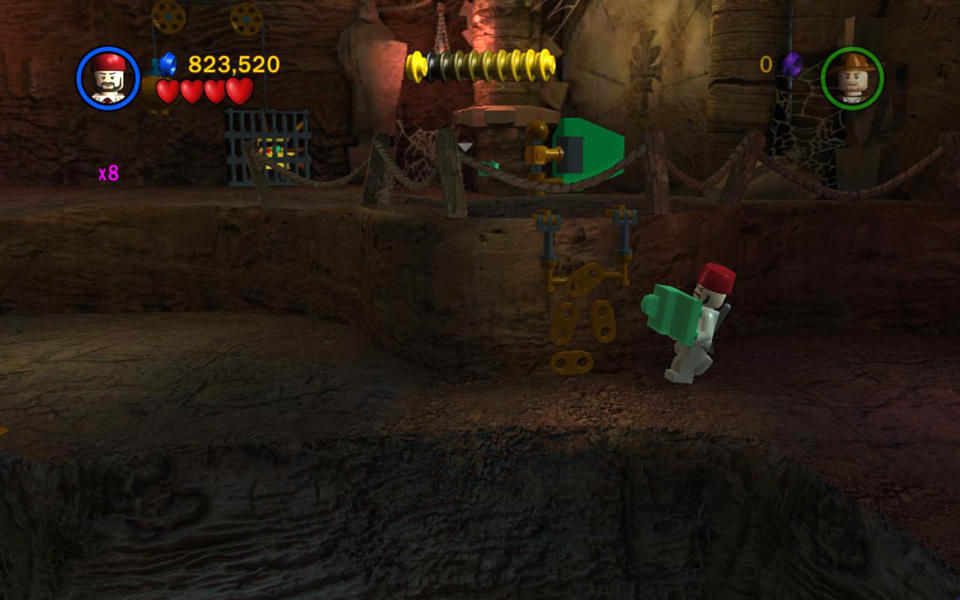
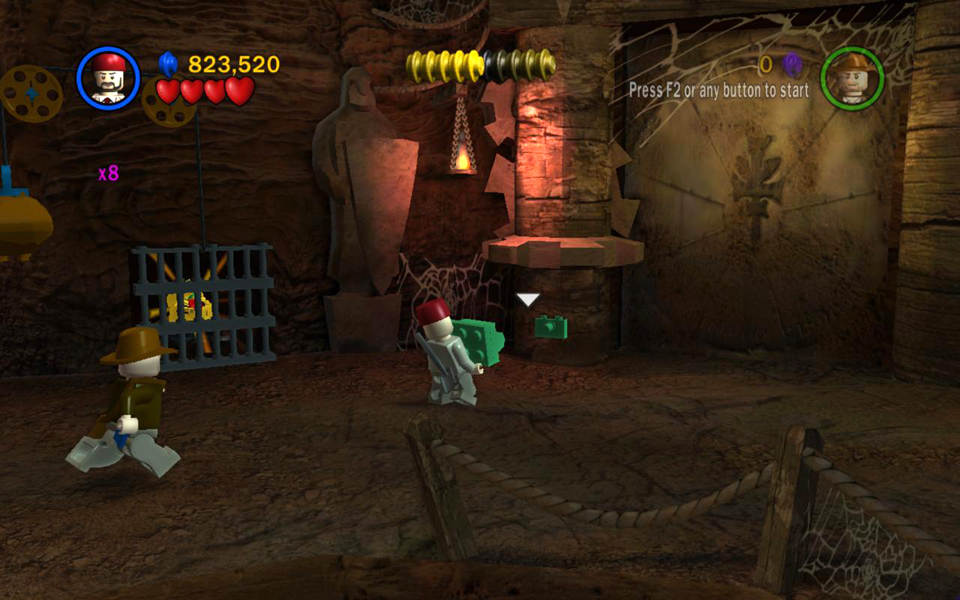
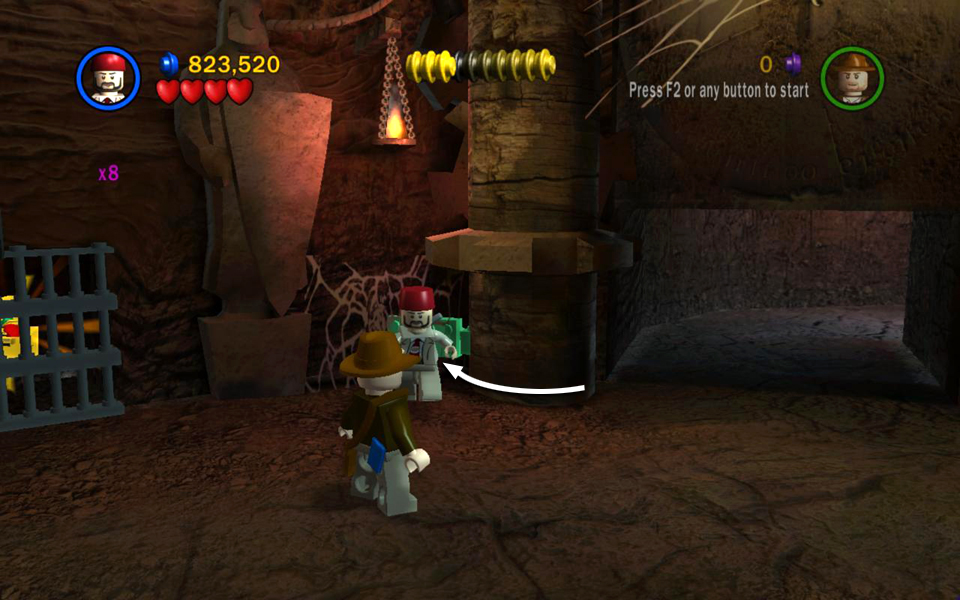
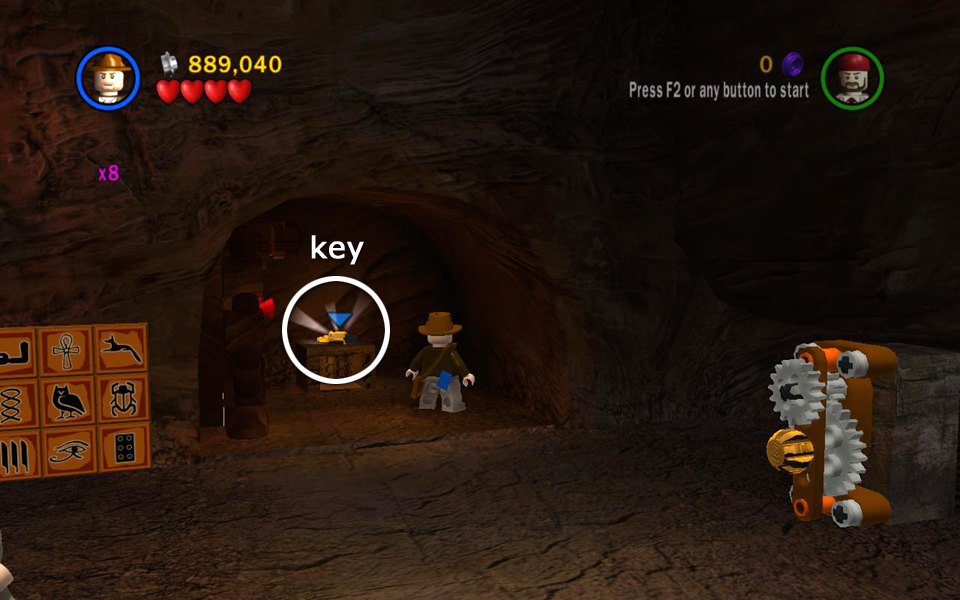
FREE PLAY: Use a small-sized character to go through the crawlspace onto the ledge above. Pull the lever to open a concealed door on the wall below the ledge.
Go through the doorway to a small room with a cage containing artifact piece #3. Have one character stand on the platform to raise the cage so the other can get the treasure chest. Then return to the main cavern.
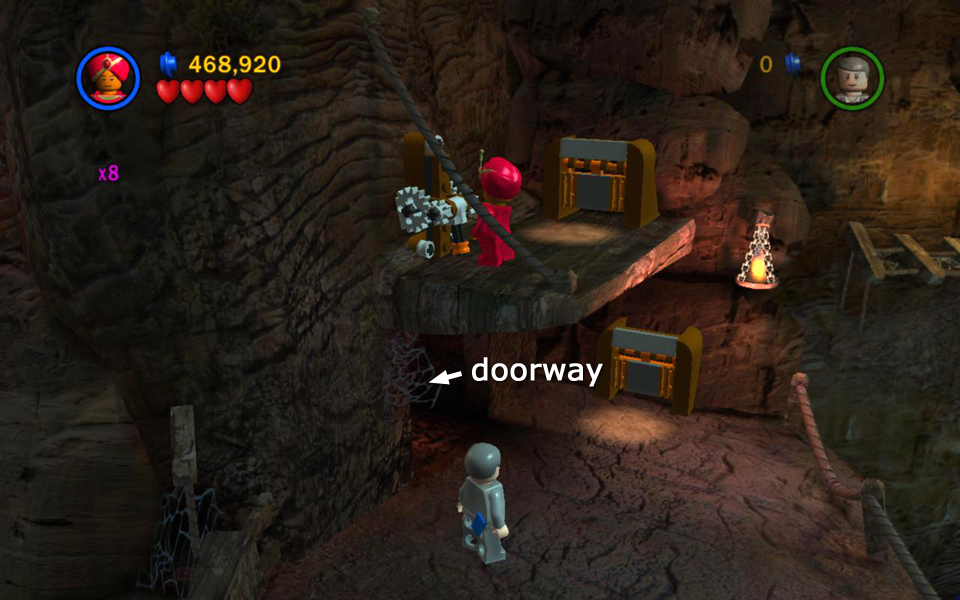 Use a small character to reach the lever and open the door. |
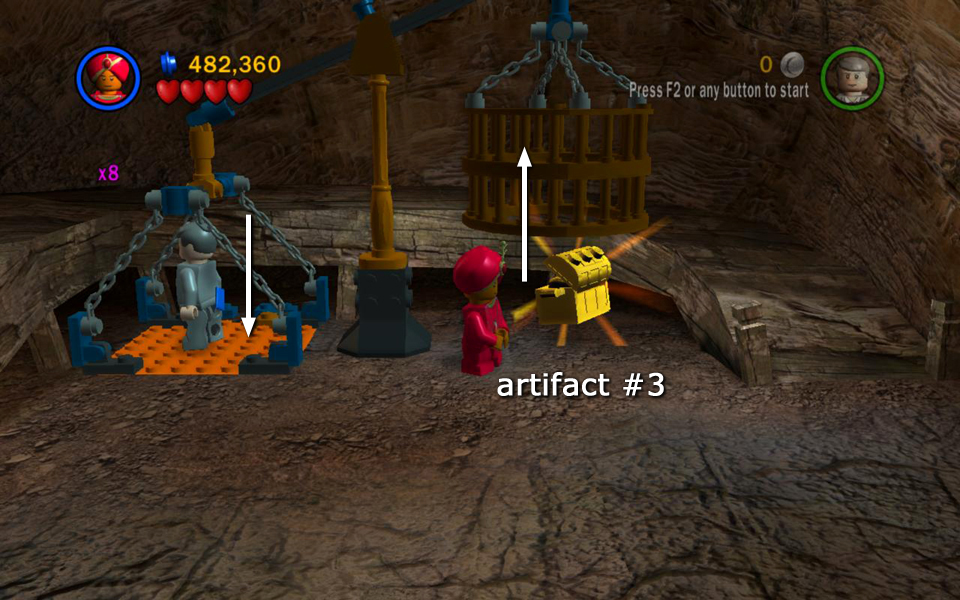 Stand on the platform to raise the cage over artifact piece (3/10). |
Cross the wooden bridge on the right. Move quickly but carefully to avoid falling through the weak slats.
On the other side of the bridge you can see artifact piece #4 sitting behind a pair of spinning blades. You have to be quick to get it without dying. Stand close, wait until the lower blade has almost retracted and then step into the treasure chest. Then quickly jump out before the second blade gets you. Don't worry if your character dies immediately after getting the artifact. It still counts. ;)
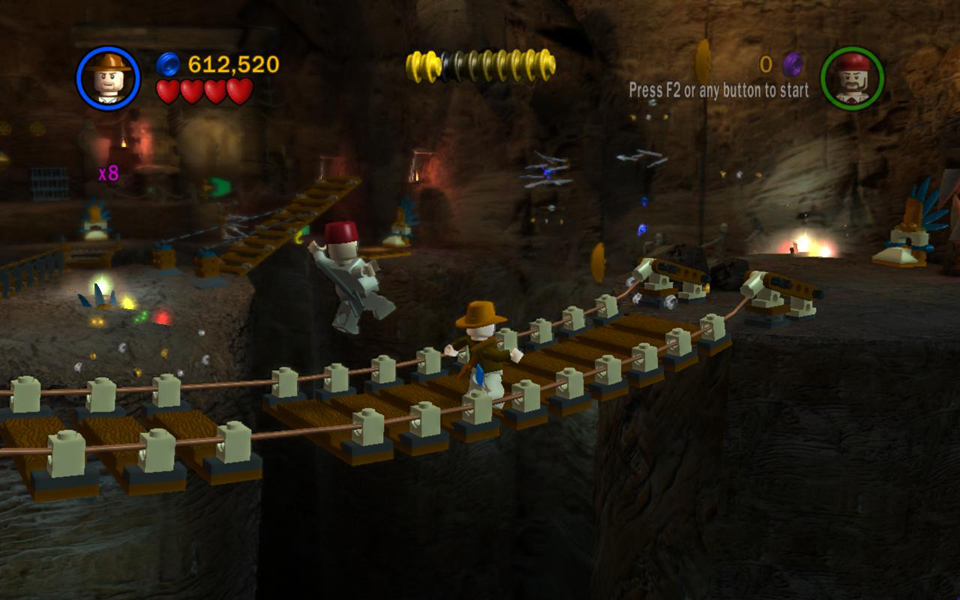 Cross the rickety bridge carefully. |
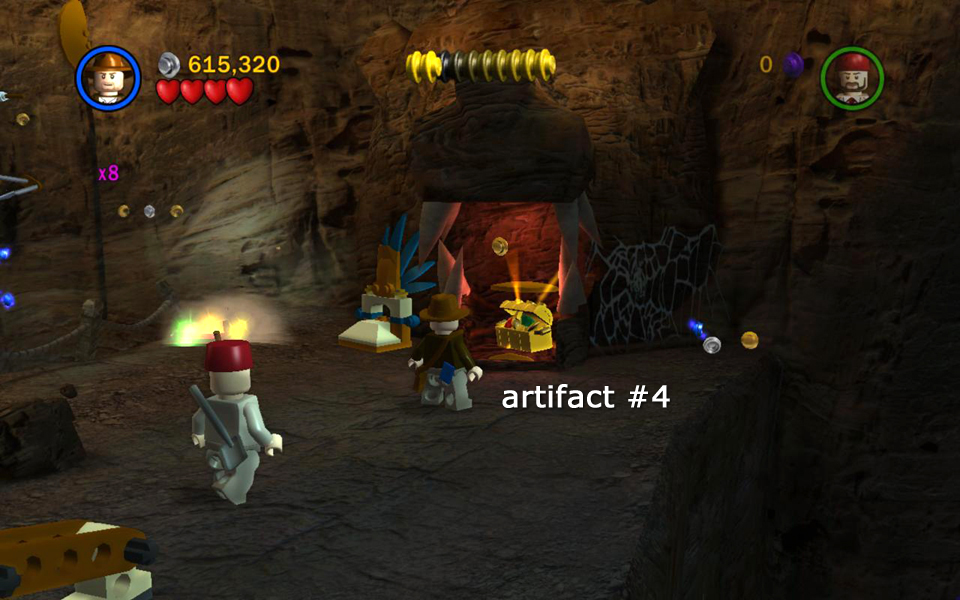 When the lower blade retracts, move in to get artifact piece (4/10). |
Next, have Sallah dig a cup full of bits out of the ground on the left. Smash the cup and build a handrail on the cavern wall.
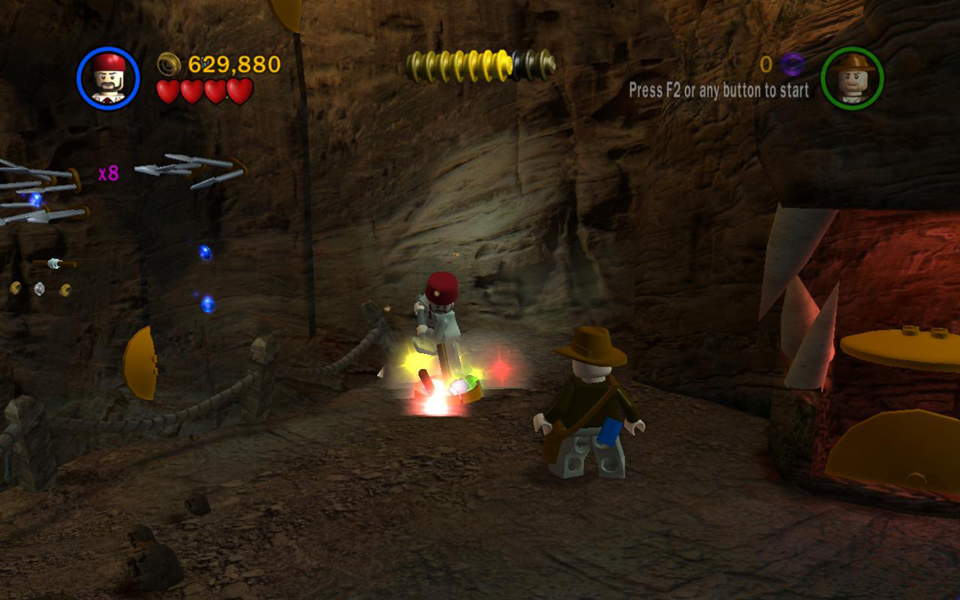 Dig up the sparkling patch to get a cup of bits. |
 Smash the cup and build a handrail. |
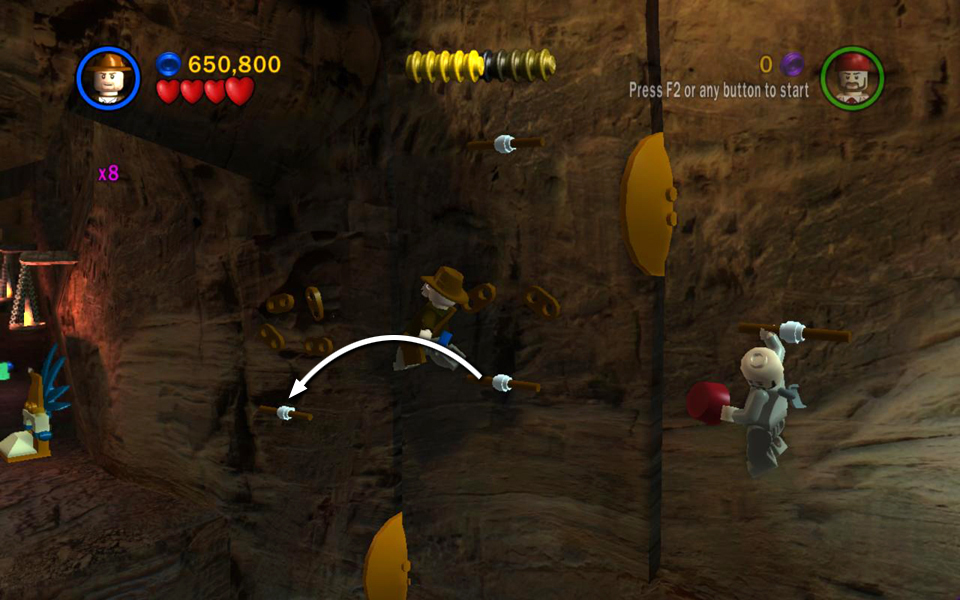
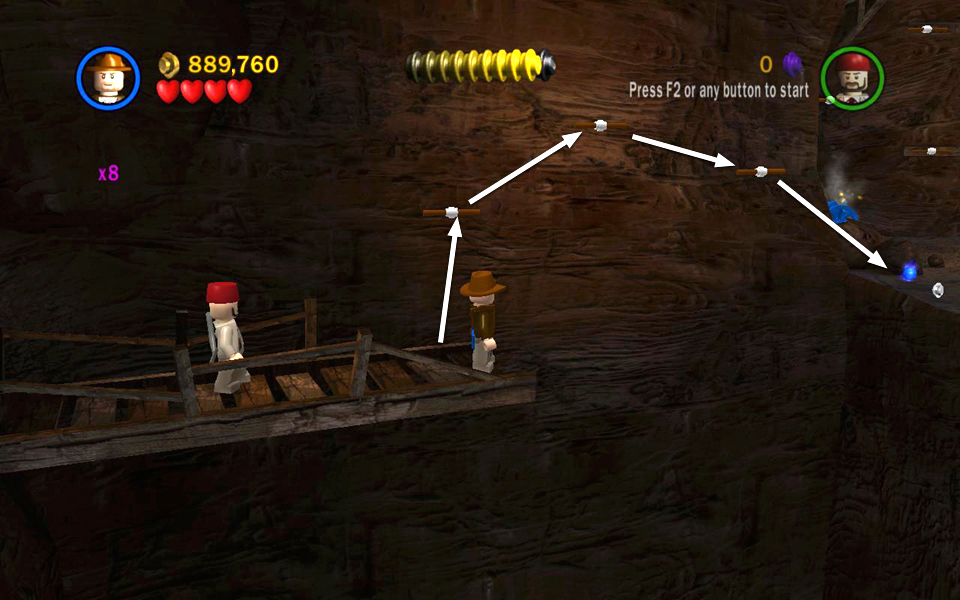
Now comes some tricky jumping: Leap from the ledge to the handrail you just built. Watch the rolling blade and the set of spikes beyond it. When the blade moves downward, jump past it to grab the handrail above the spikes. Then wait for the spikes to retract and drop to grab the rail below.
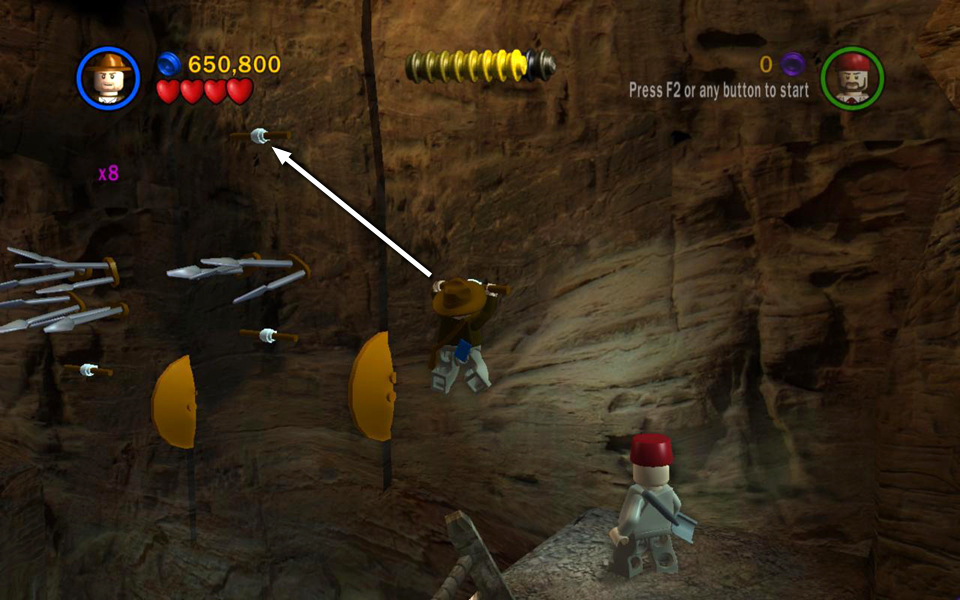
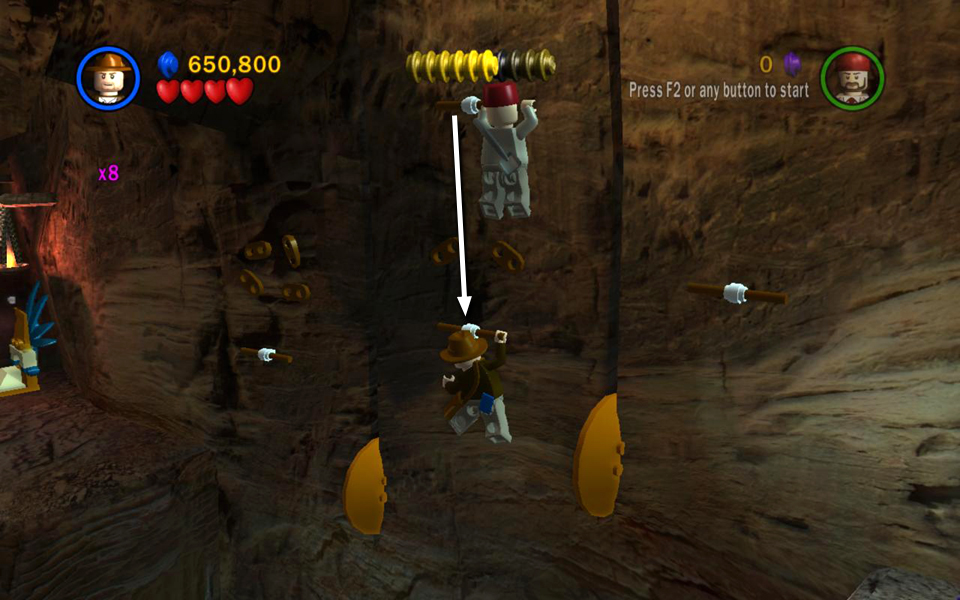
Watch the blade on the left, as well as the spikes directly above and the ones beyond the blade. When both sets of spikes retract and the blade moves downward, quickly jump to the left to grab the next handrail. (Here it may help to jump diagonally left and upward; otherwise, you may miss the handrail and fall into the chasm.) While hanging from the railing nearest the ledge on the left, wait for the spikes above to retract again before taking the final jump to the left.
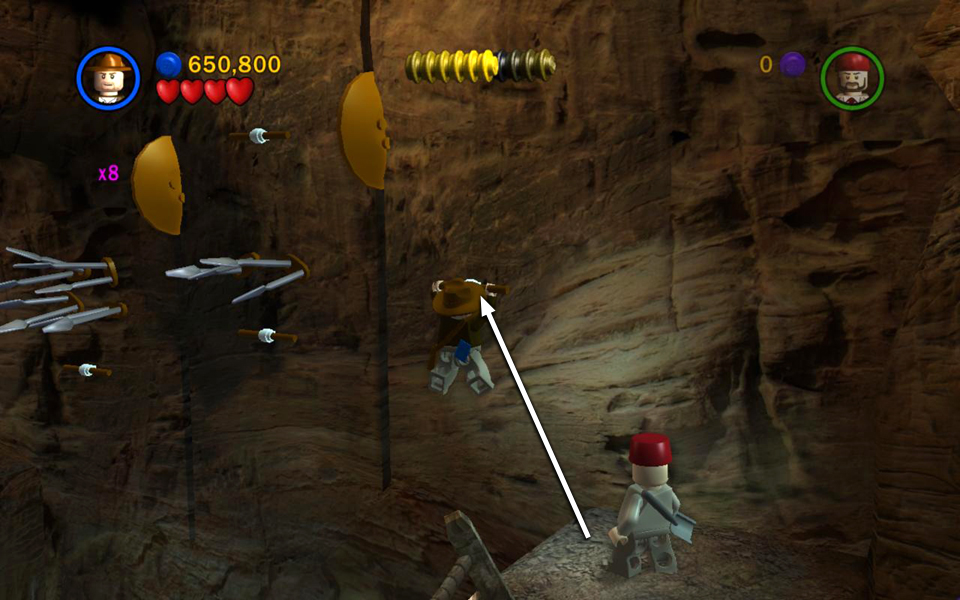 Jump from the ledge to the rail you just made. |
 When the first blade moves down, jump past it. |
|
 Wait for the spikes below to retract, then drop. |
 When the spikes retract and the blade moves down, jump to the next handrail. |
|
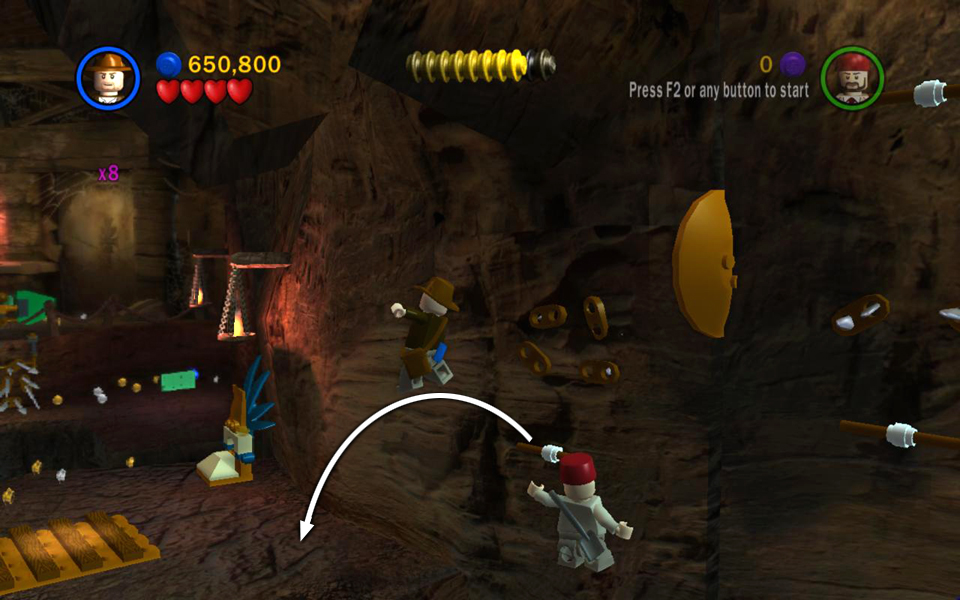 When the spikes above retract again, jump over to the ledge. |
||
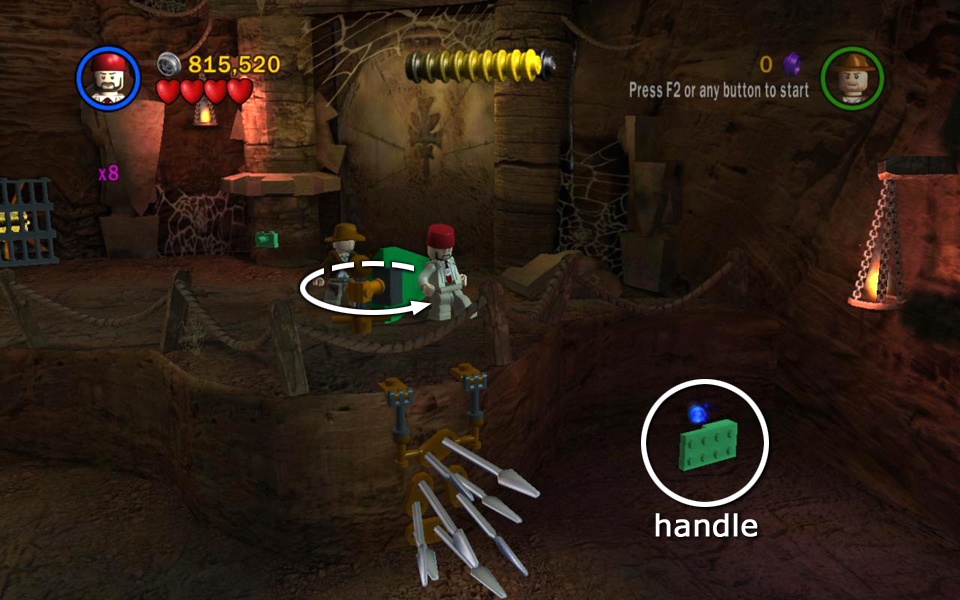
Stand Indy on the whip platform and use his whip to pull down the bridge on the left. Cross over and have Sallah dig up the statue on the other side. Smash it and use the leftover bits to build a handle for the next bridge. Push the handle forward to extend the bridge so you can cross.
On the other side of the bridge, spikes prevent you from following the ledge to the right. So go up the path on the left.
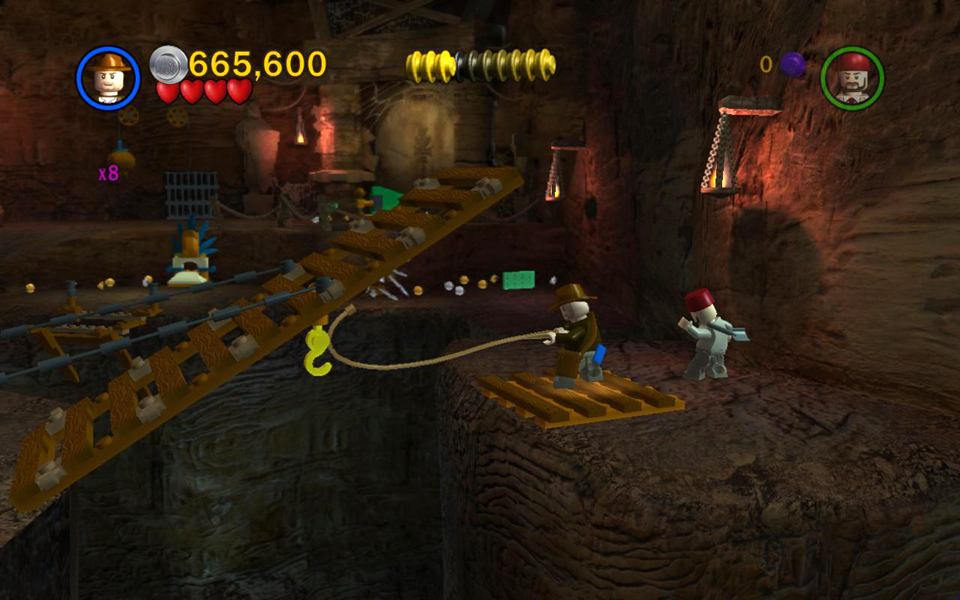 Use Indy's whip to pull down the bridge. |
 On the other side, dig up another statue. |
|
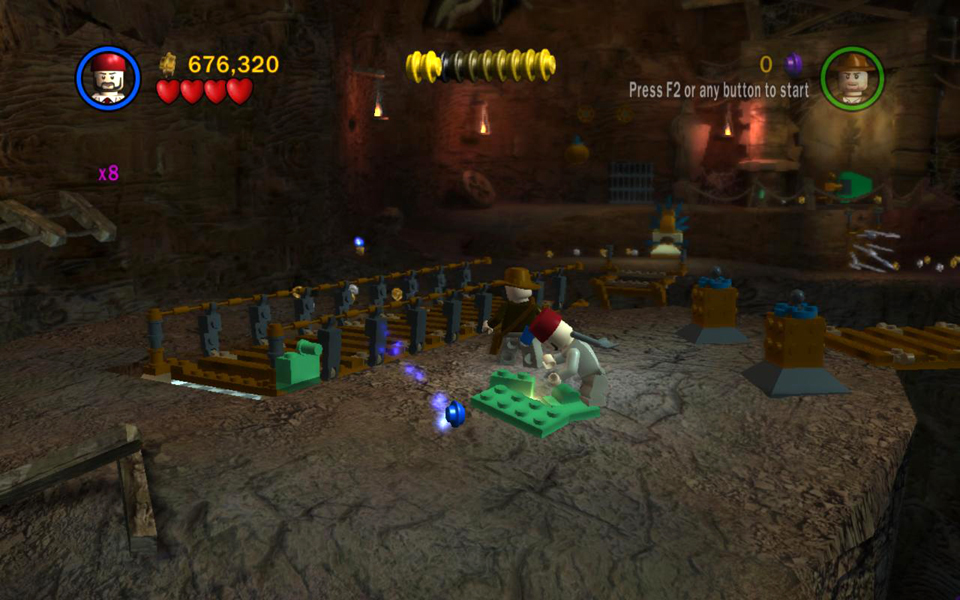 Smash the statue and build a handle. |
 Push the handle to extend the next bridge. |
FREE PLAY: Use a character armed with a sword to cut the cable above the barred door (aim and press Use to throw the sword). This opens the door so you can retrieve artifact piece #5, along with a purple stud and some others.
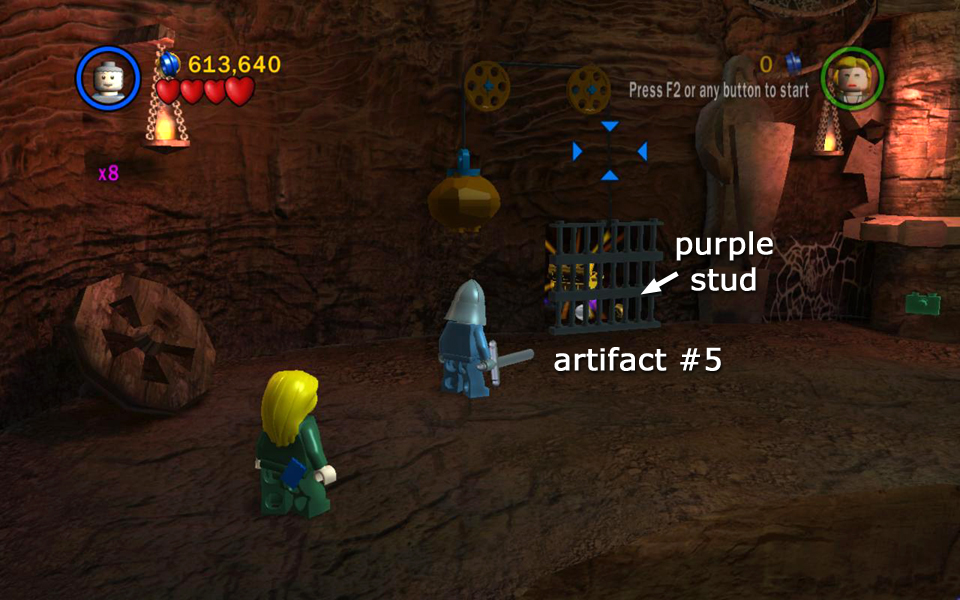 Use a sword to cut the rope and open the bars. Artifact piece (5/10) is inside. |
NOTE: In Story Mode, if you have unlocked and activated the "Treasure Magnet" Extra, you can stand near the barred door to attract the purple stud inside without actually having to open the door.
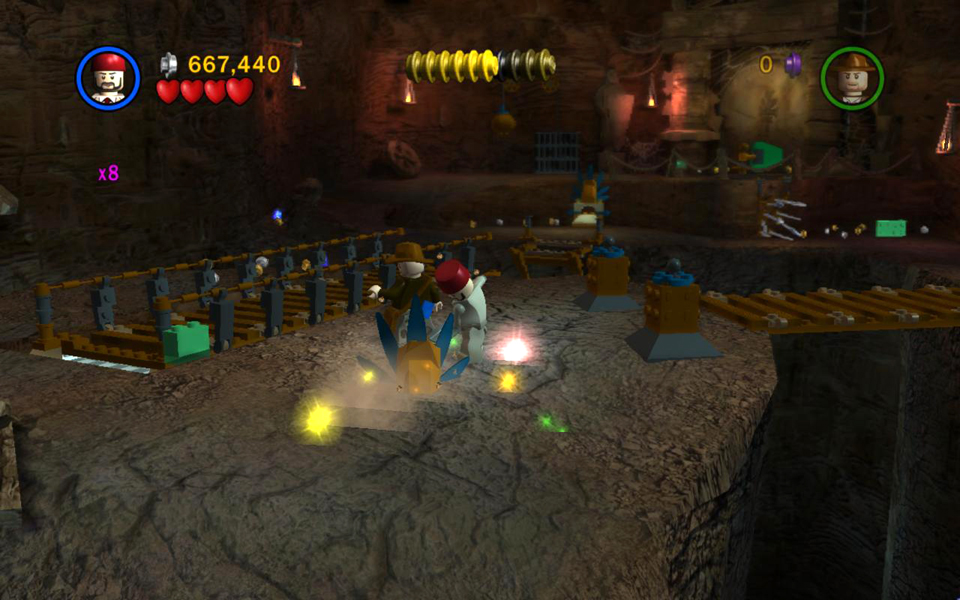
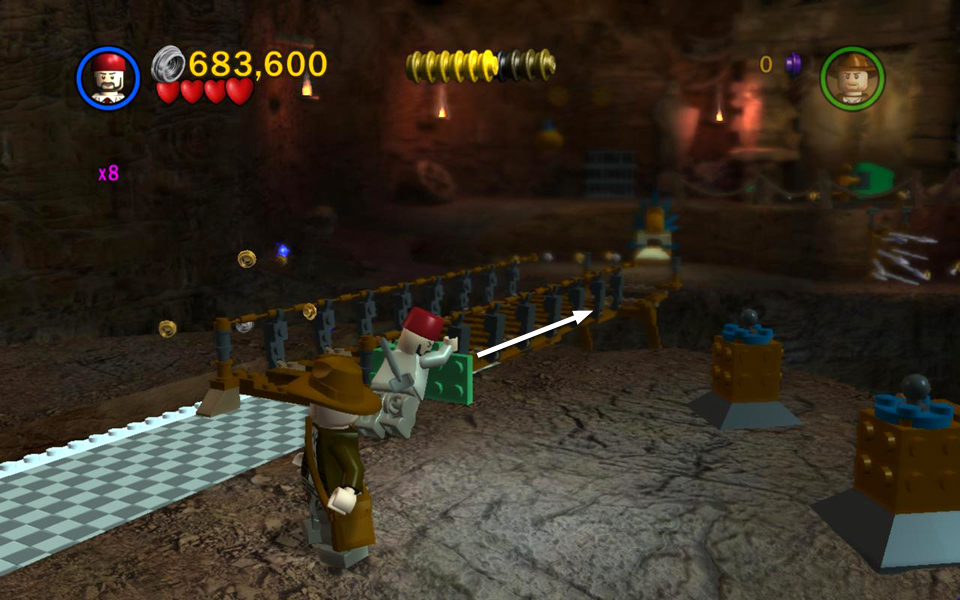
Move along the upper level to the right. Push the spinner counterclockwise to retract the spikes on the ledge below. Then hop down on the right side and get the green handle lying on the ground. Carry it to the left, past the retracted spikes, and up the path to the doorway at the back right. Attach the handle to the green plate on the column near the door and push it to the left open the exit.
NOTE: If you're playing a co-op game, one character can retract the spikes while the other retrieves the handle. If you're playing alone, be sure to push the spinner all the way around until the spikes lock in the retracted position. Otherwise, they'll start to pop out again as soon as you let go of the paddle.
 Turn the spinner to retract the spikes below. |
 Carry the handle along the ledge. |
|
 Attach the handle to the column near the exit. |
 Push the handle to open the door. |
Area 4: More Traps and Trials [jump to top]
(Click any of the screenshots below to enlarge.)
FREE PLAY: Just beyond the entrance from the previous area there's a crawlspace. Toggle to a small-sized character to crawl through. Turn the key mechanism on the ledge above to raise the stairs on the left, as well as the bars over the alcove with artifact piece #6.
 Go through the crawlspace and turn the key on the ledge above. |
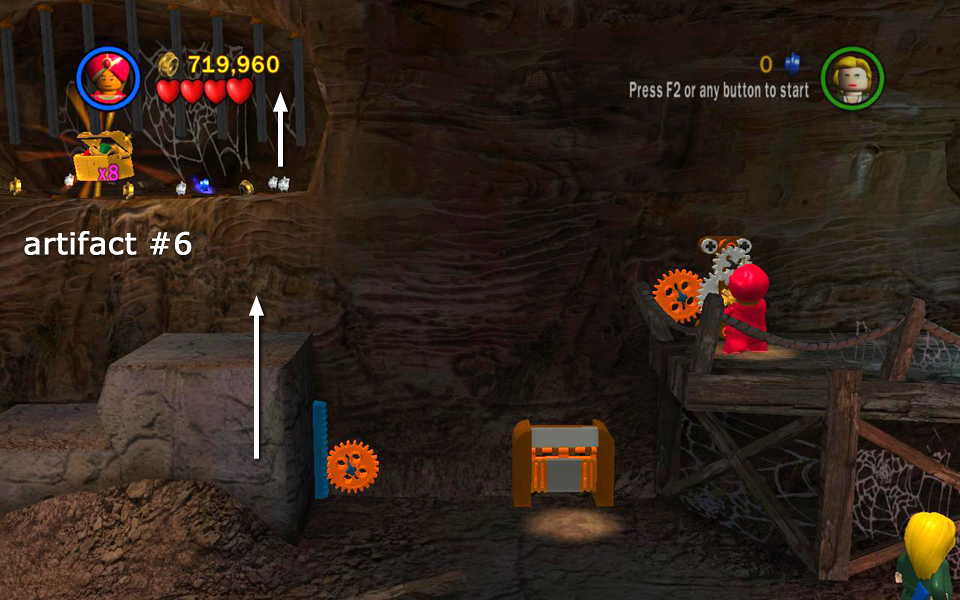 This raises the stairs and bars so you can get artifact piece (6/10). |
Use the dangling vine to swing across the chasm. Solve the hieroglyph puzzle to open a door to the right. Move Indy onto the whip platform and use his whip to grab the red gem sitting on the rock above the chasm. Place the red gem in the receptacle behind the door you just opened. This causes the inner door to swing open, revealing a golden key.
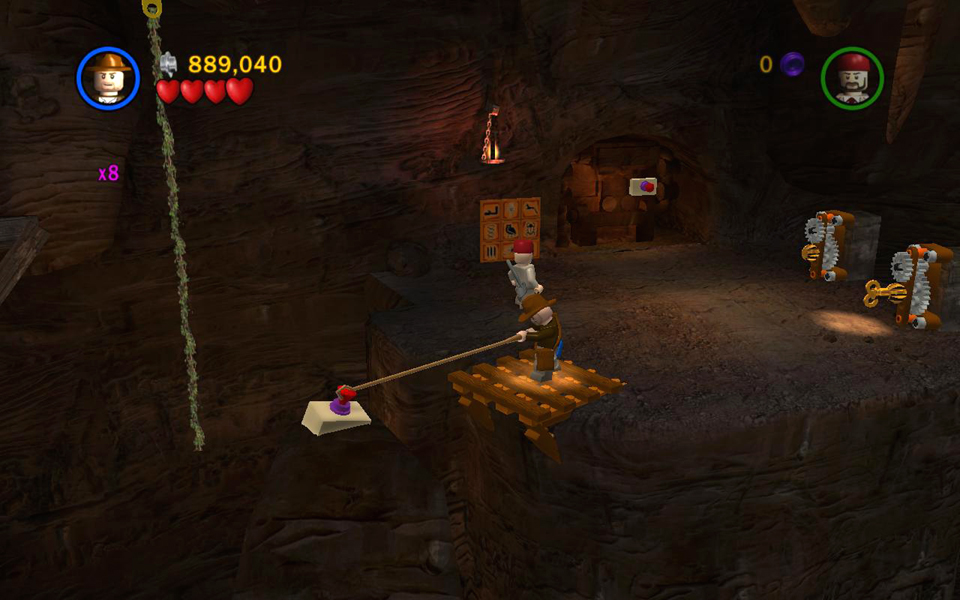
Place the key in the mechanism on the right and have each character turn one of the keys to raise the bridge leading to the next ledge. The bridge ends halfway across the gap. So you'll need to use the handrails on the cavern wall to get the rest of the way across.
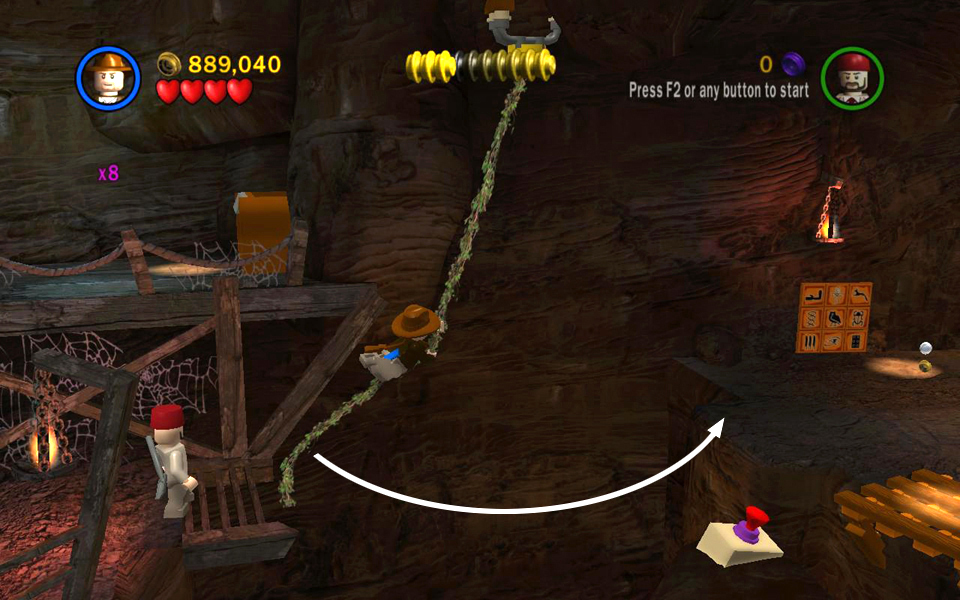 Use the vine to swing across the gap. |
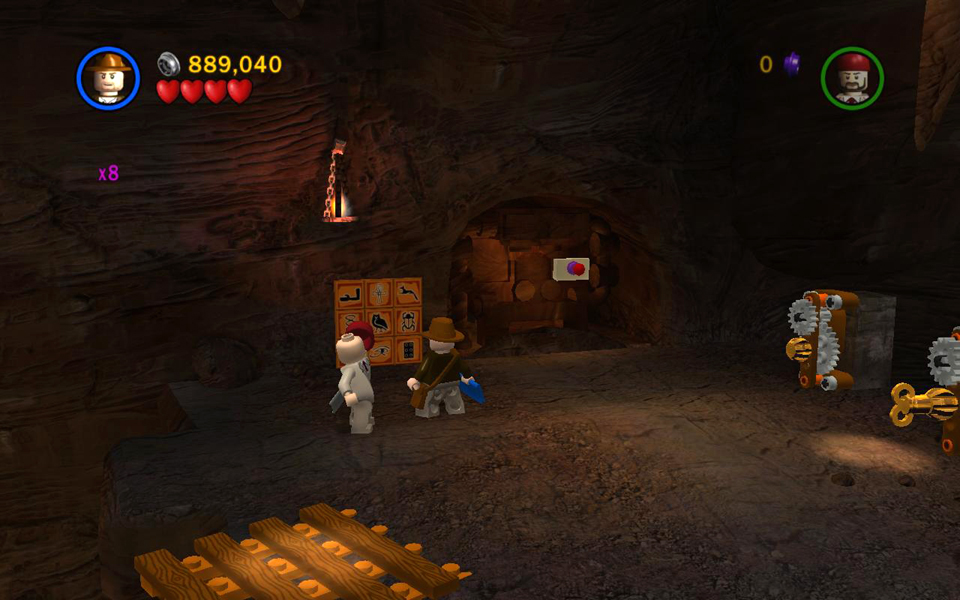 Solve the glyph puzzle to open the door. |
|
 Use Indy's whip to grab the red gem. |
 Place the gem in the receptacle behind the door. |
|
 The inner door swings open. Inside is a key. |
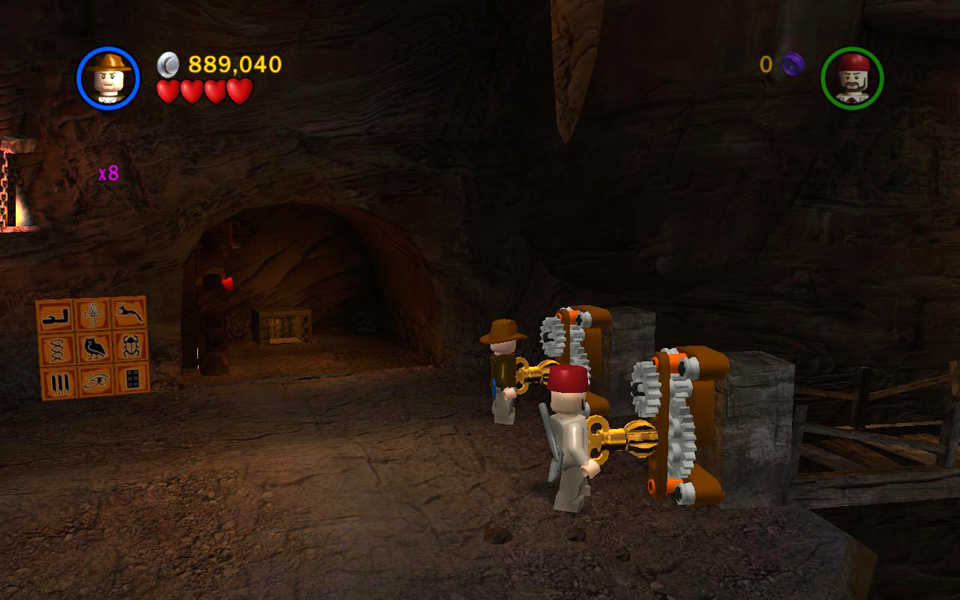 Use this key and the one already in place to raise the bridge. |
|
 Use the bridge and handrails to cross the gap. |
||
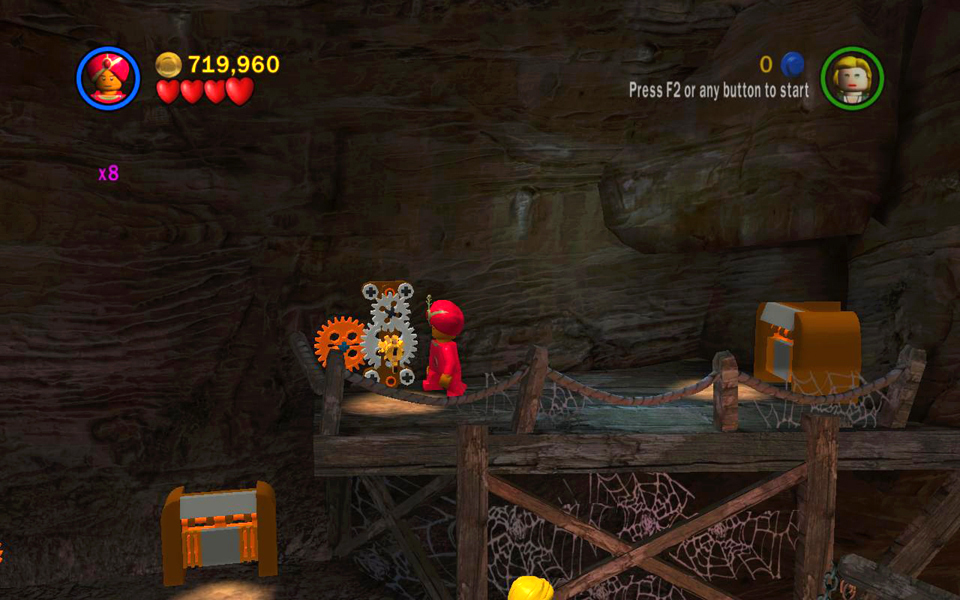
FREE PLAY: Use a character with the repair ability to fix the blue engine. This activates a series of retracting handrails on the back wall. Climbing the handrails to the ledge above is tricky. You may want to use a female character, since women are better jumpers. Begin by grabbing the lowest rail. Wait until the rail above on the left is just about to extend and then jump to grab it. Quickly jump to the rail above on the right. Before it can retract again, jump to the rail directly above and from there to the ledge on the left. There you'll find artifact piece #7.
 Use a character with a wrench to fix the machine. |
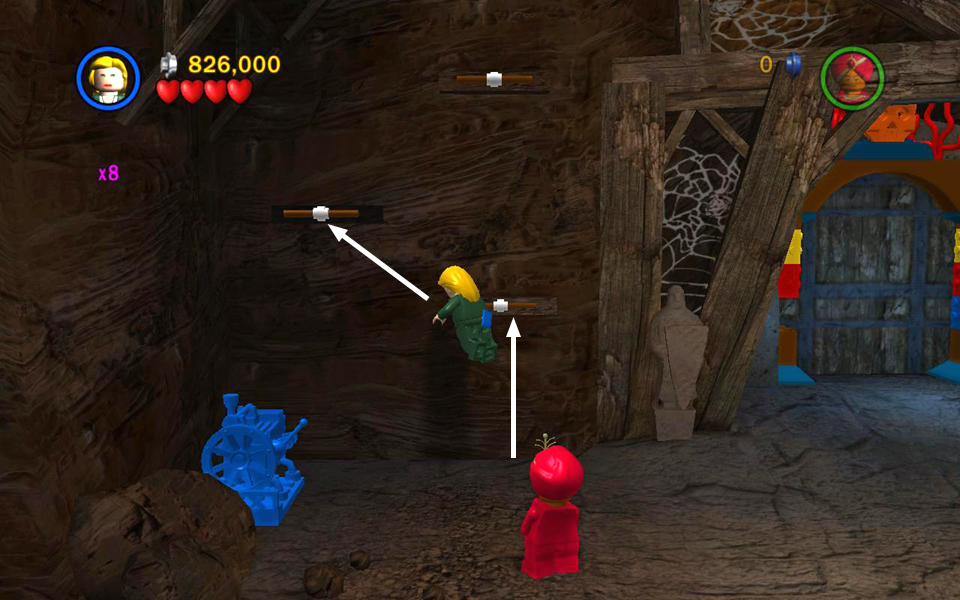 Climb the retracting handrails. . . |
|
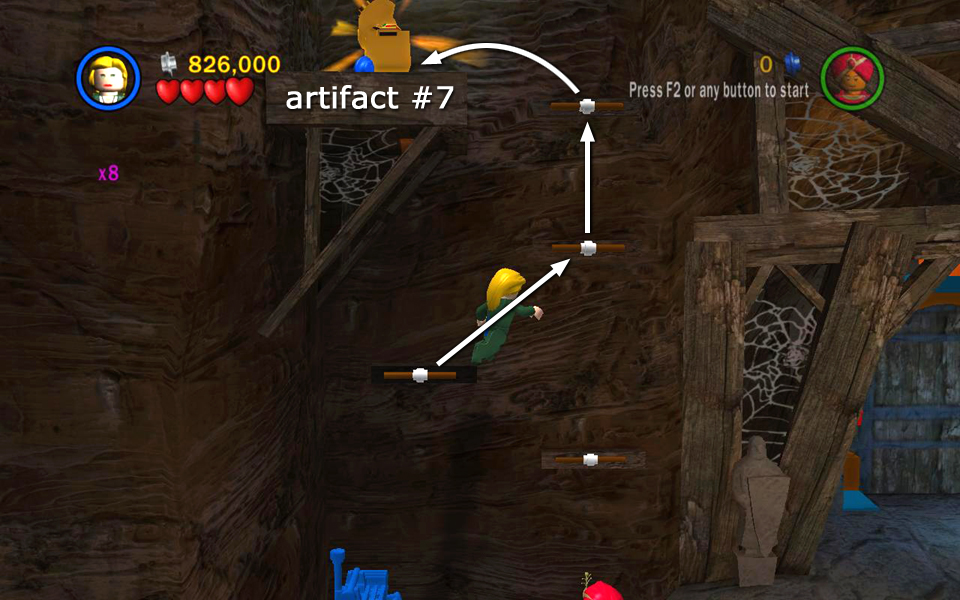 . . . to reach artifact piece (7/10) above. |
||
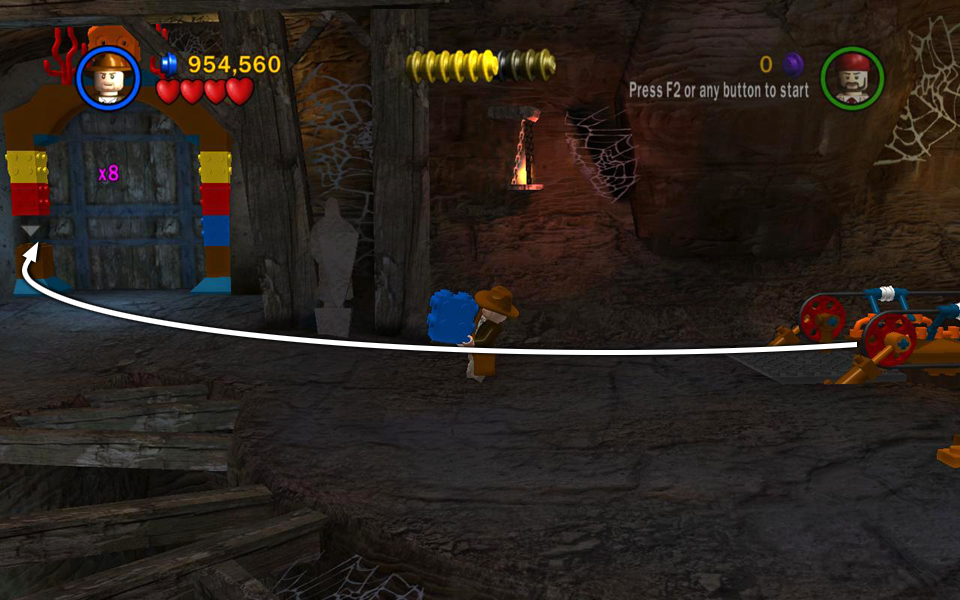
The exit from this area is on the back wall here but, like the door in the Temple Anteroom (Area 1), this one is missing a block and won't open until you find it.
Head to the right and carefully retrieve the purple stud sitting on one of the wooden beams spanning the gap. Then continue to the right and whip swing across the gap. Use the pile of LEGO bits on the other side to build a dangling vine. In a co-op game, the player controlling Sallah can climb down the ladder near the whip platform, cross the wooden ledges and then climb up the rope. If you're playing alone, Sallah will do this automatically.
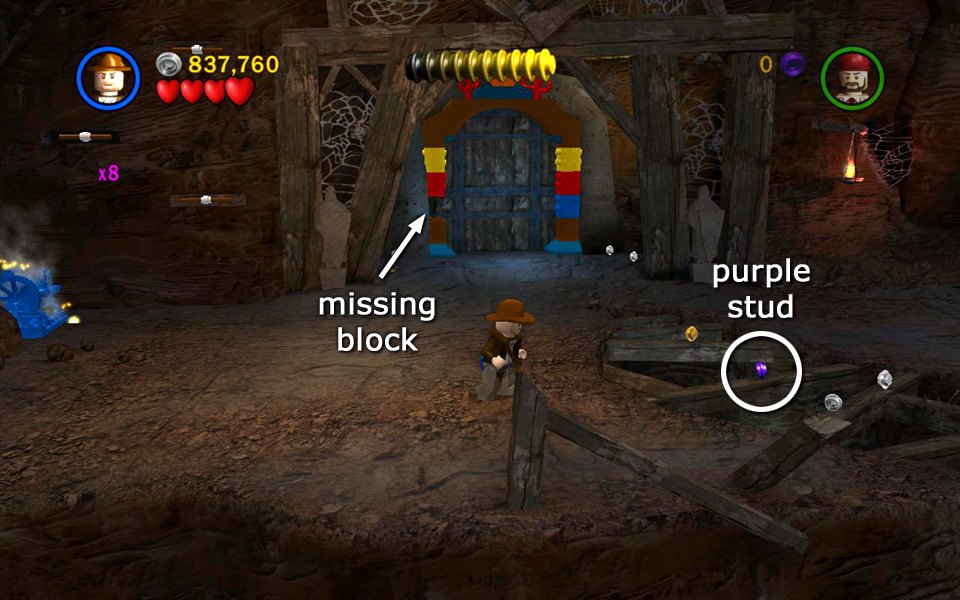 Go past the exit with the missing block and get the purple stud on the narrow beam. |
 Have Indy whip swing across the gap. |
|
 Use the pile of LEGO bits to build a dangling vine. |
 Sallah can then cross the lower ledges and climb the vine. |
Continue to the right. Have Sallah jump over the snake pit, which Indy won't dare to approach. Grab the lit torch from the sconce on the wall and use it to light a fire in the snake pit, clearing the way so Indy can cross.
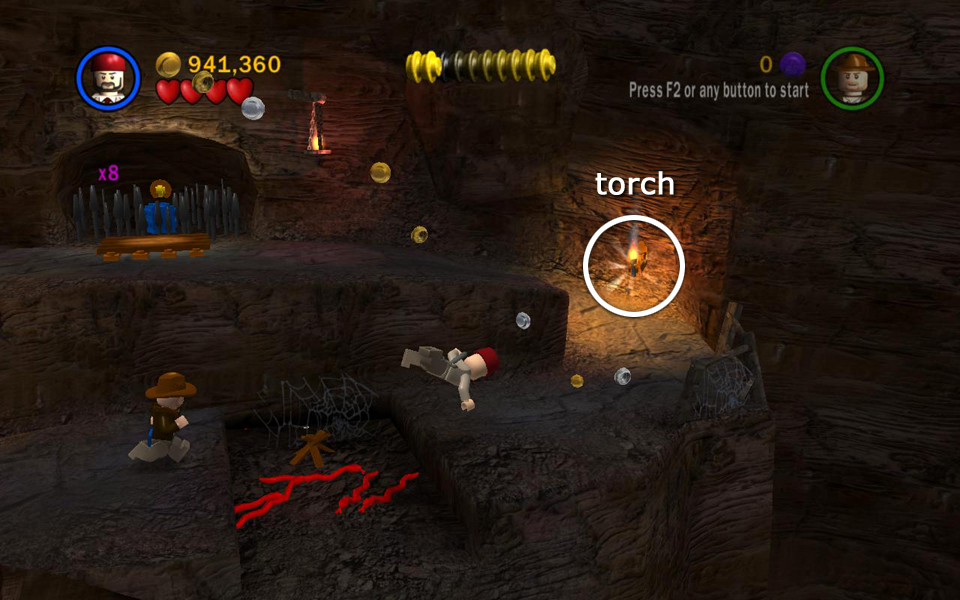 Have Sallah cross the snake pit and get the torch. |
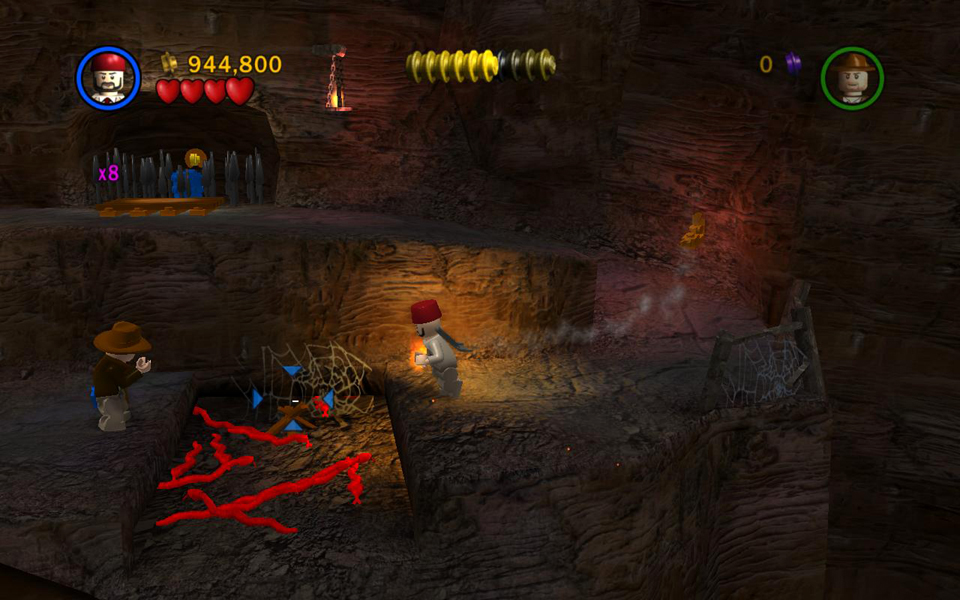 Then light the fire in the pit so Indy can follow. |
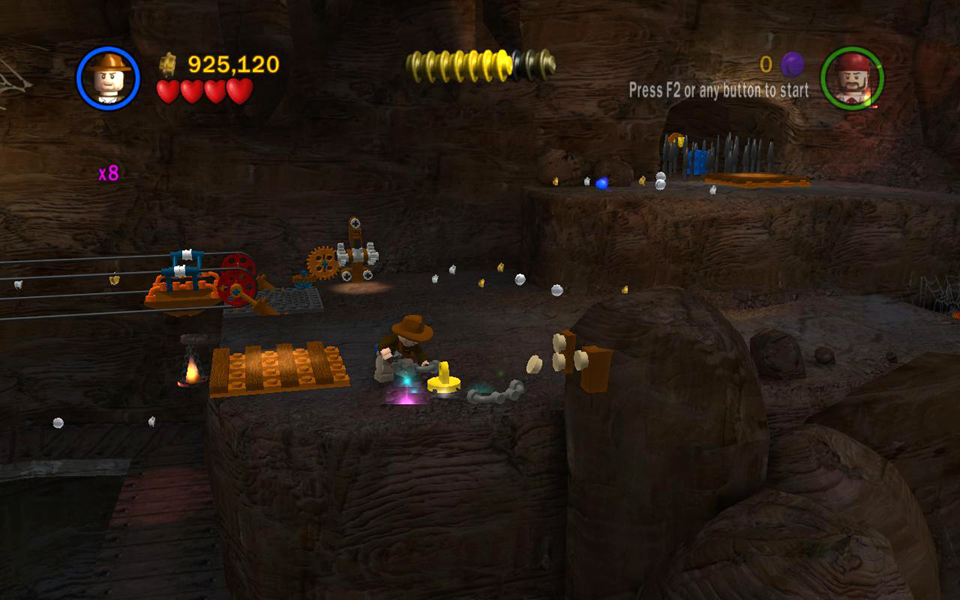
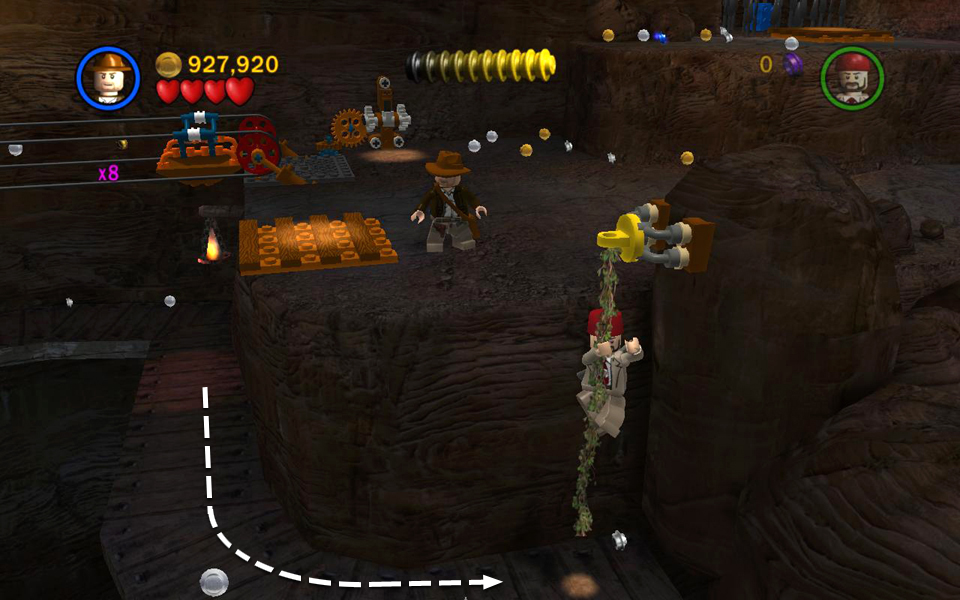
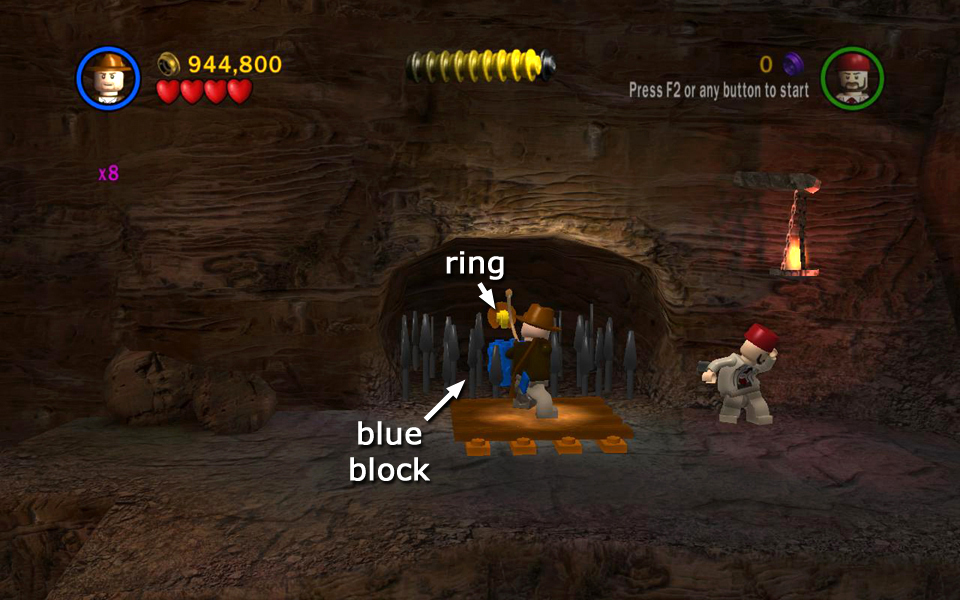
Follow the path around to the ledge above. Position Indy on the whip platform and use his whip to pull the ring in the alcove behind the spikes. This causes the spikes to retract so you can get the blue LEGO block. Grab it, carry it to the left and hop down off the ledge. Place the blue block on the conveyor. Pull the lever to start the conveyor moving. Whip swing back to the left and retrieve the block when it reaches the other side. Add it to the column on the left side of the door to open the exit.
 Use Indy's whip to retract the spikes. |
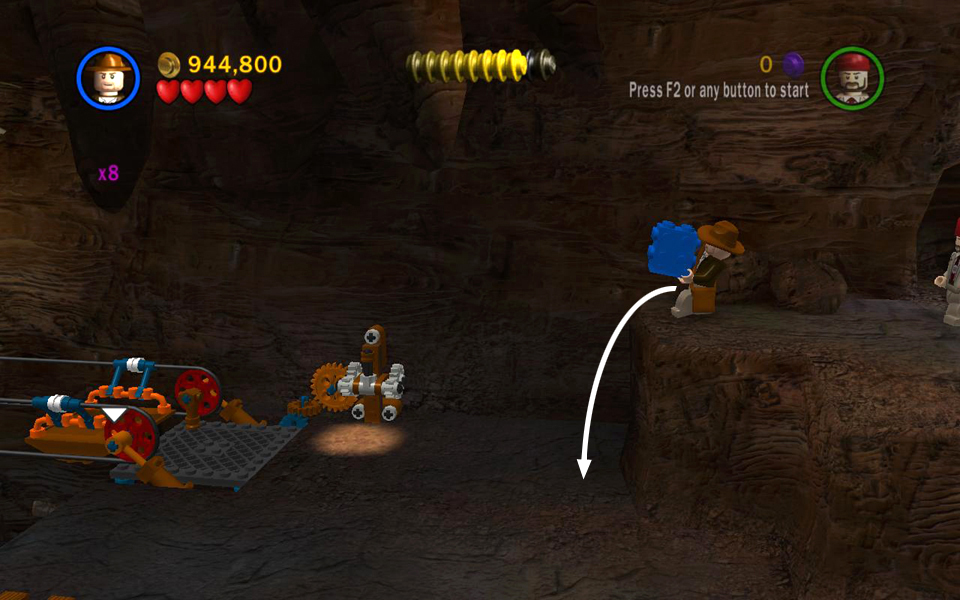 Carry the blue block down off the ledge. |
|
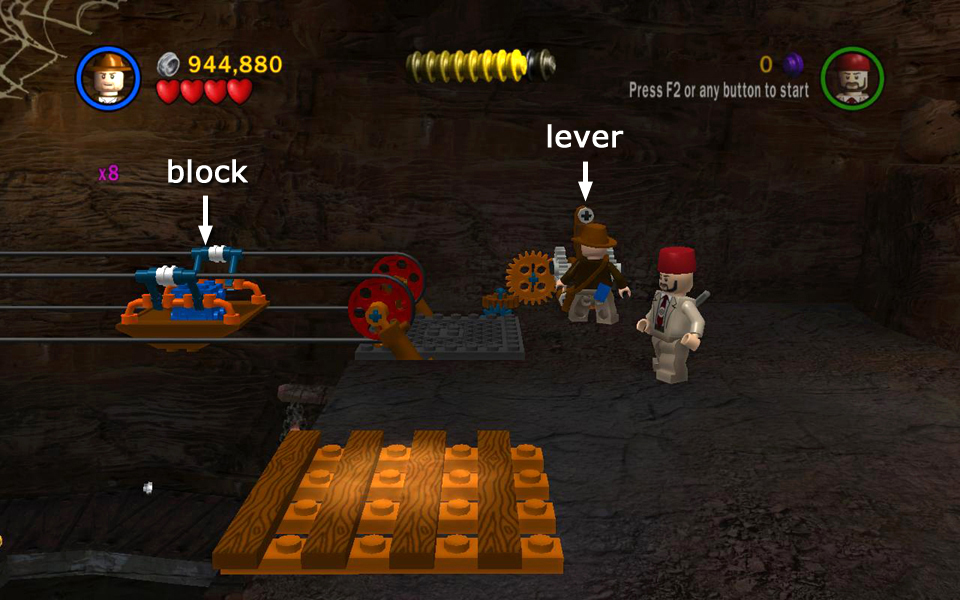 Use the conveyor to move the block across the gap. |
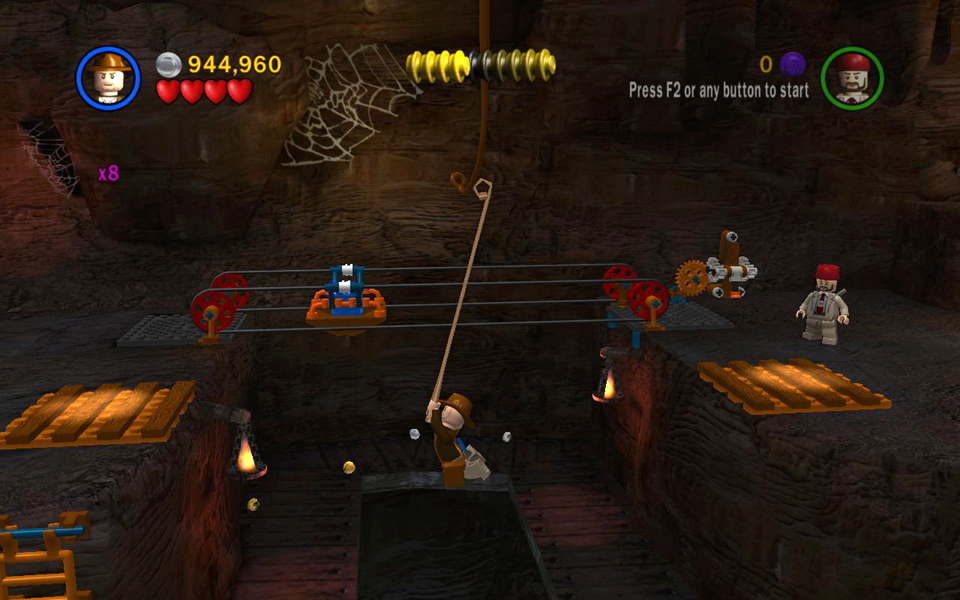 Whip swing back to the left. |
|
 Retrieve the block and use it to open the door. |
||
In the next room there's a fragile floor made of lettered tiles above a deep pit. To get across you must jump only on the lighted tiles. The dark tiles collapse if you stand on them for more than a moment. So watch the tiles as they light up and jump across them in the sequence that spells out one of the ancient names of God: I-E-H-O-V-A-H. As you jump from the second 'H' to the ledge near the exit, the door opens. Follow the hallway to the next room.
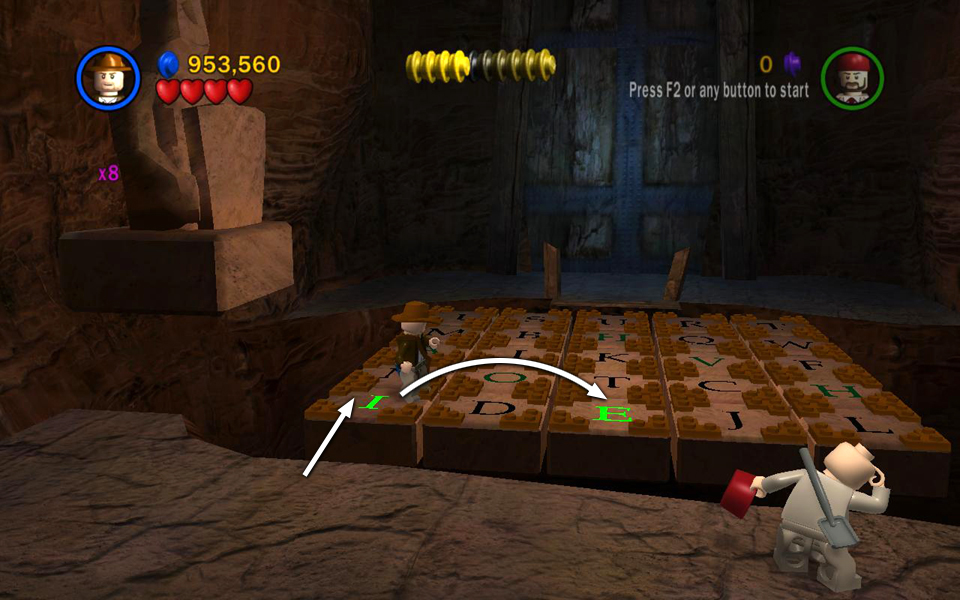 Jump across the tiles as they light up. First 'I', then 'E'. |
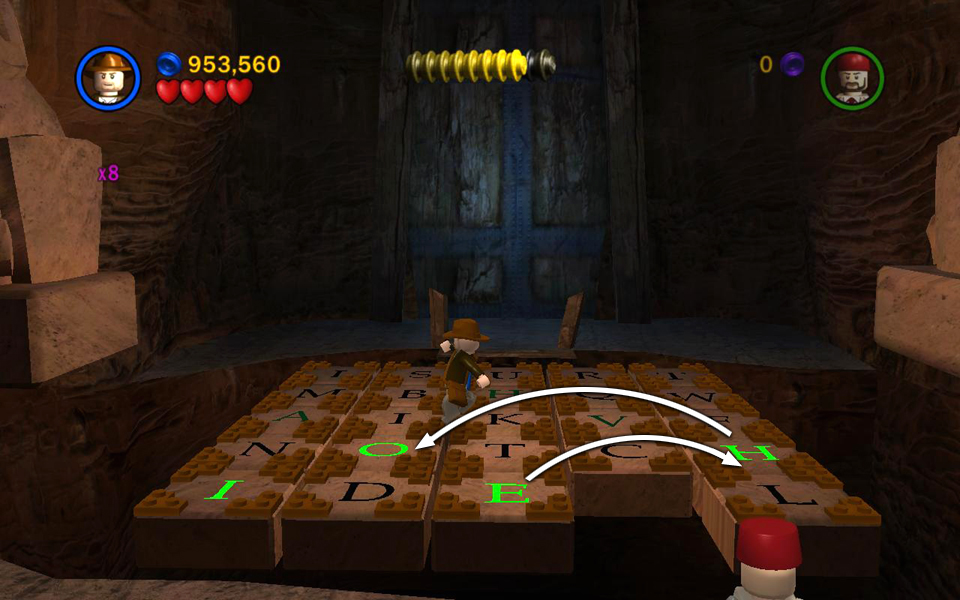 . . . 'H'. . . 'O'. . . |
|
 . . . 'V'. . . 'A'. . . and finally 'H'. |
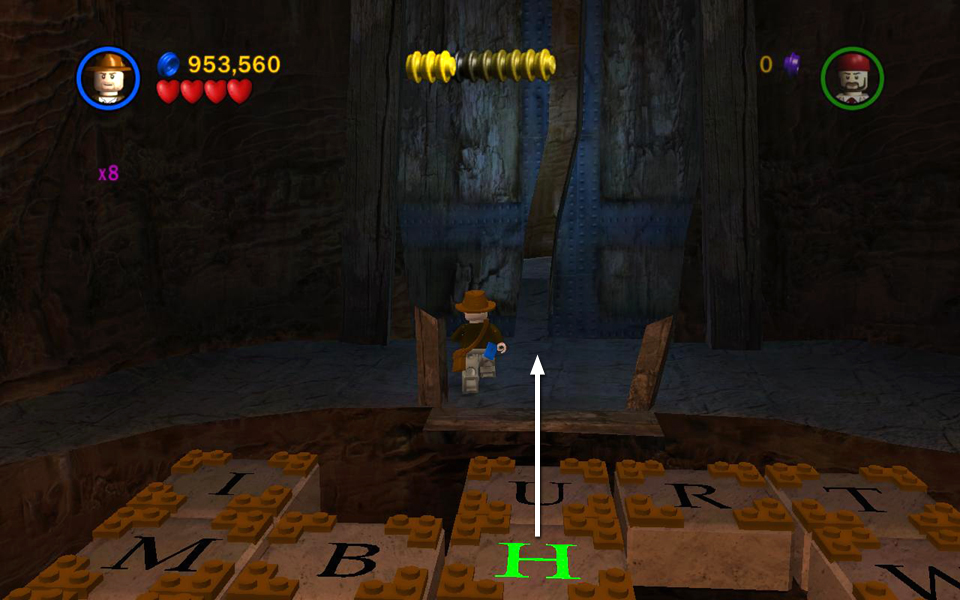 When you've stepped on the tiles in sequence, the door opens. |
Area 5: A Leap of Faith [jump to top]
(Click any of the screenshots below to enlarge.)
FREE PLAY: Just beyond the entrance to this area, you'll see artifact piece #8 inside a giant lion statue's mouth. Use a character with explosives to blow up the silver teeth so you can reach the treasure chest.
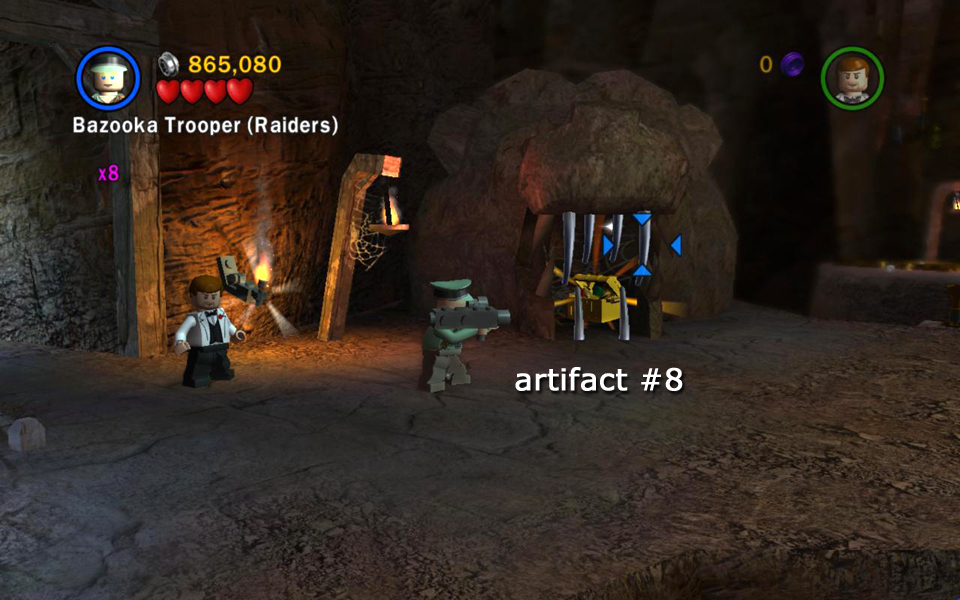 Use explosives to blow up the lion's teeth and get artifact piece (8/10). |
NOTE: There's a lit torch in a sconce near the entrance. You'll need this torch when you reach the far side of this room. I tried but was not able to carry the torch across the room on the first pass. Even if Sallah holds the torch while Indy whips, builds, etc., the torch would still go out or get lost before I got to the other side. So I ended up crossing the room and opening the exit, then backtracking to get the torch. If you have an alternate strategy, I'd love to hear it.
The trail of studs leading out into midair indicates the path ahead. Step out onto the invisible bridge and walk straight away from the camera until you reach the next solid ledge.
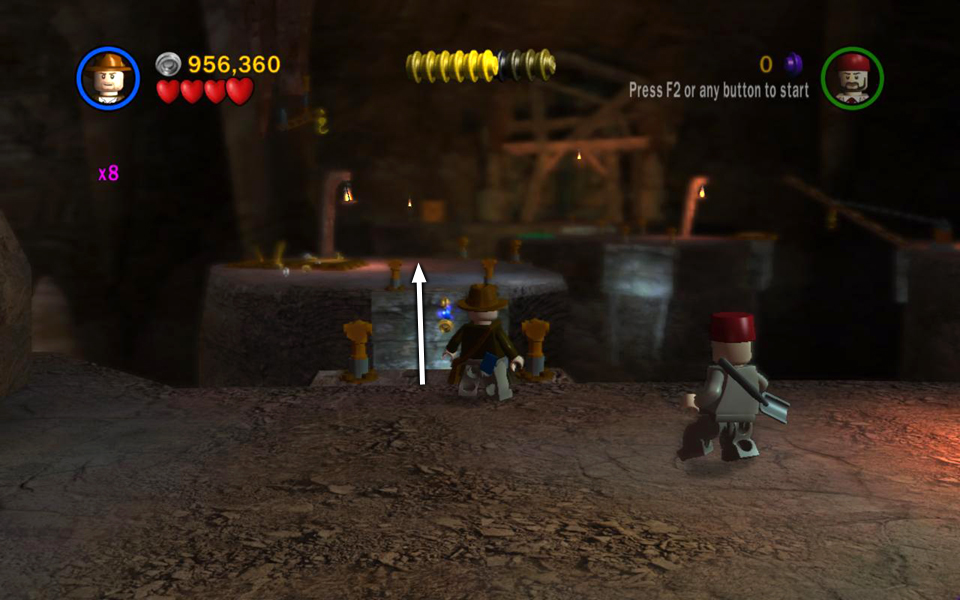 Follow the line of studs across the invisible bridge. |
Stand Indy on the whip platform there and use his whip to pull the hook above. This breaks the whip platform, as well as the adjacent wooden square. Drop into the small pit to get artifact piece #9.
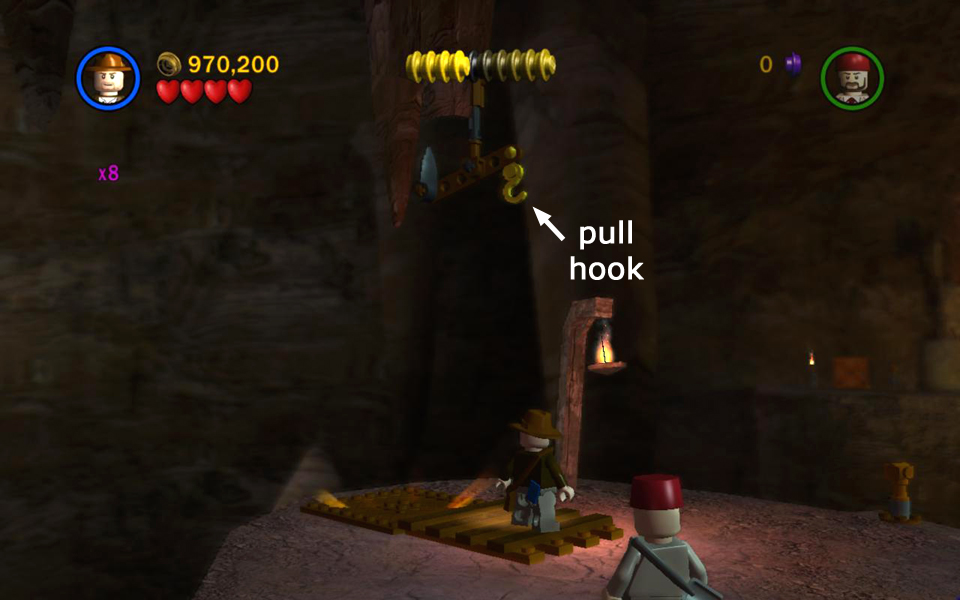 Use Indy's whip to snag the hook above. |
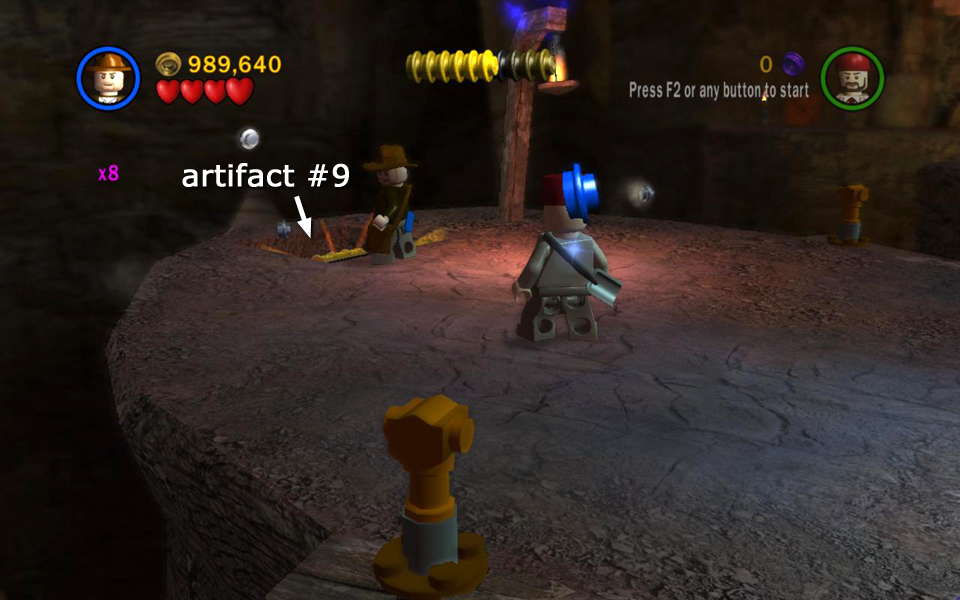 Drop into the hole to get artifact piece (9/10). |
Now cross another invisible bridge leading from the back right edge of this ledge to the next one, which has a green LEGO plate and another whip platform.
Stand on the platform and use Indy's whip to pull down the wooden bridge. Cross over it to get the box of bits on the other side. Carry it back across the bridge, drop it on the green plate and use the parts to build a spinner. Push the spinner counterclockwise as far as it will go to open the big doors in the background.
 Cross another invisible bridge to the next ledge. |
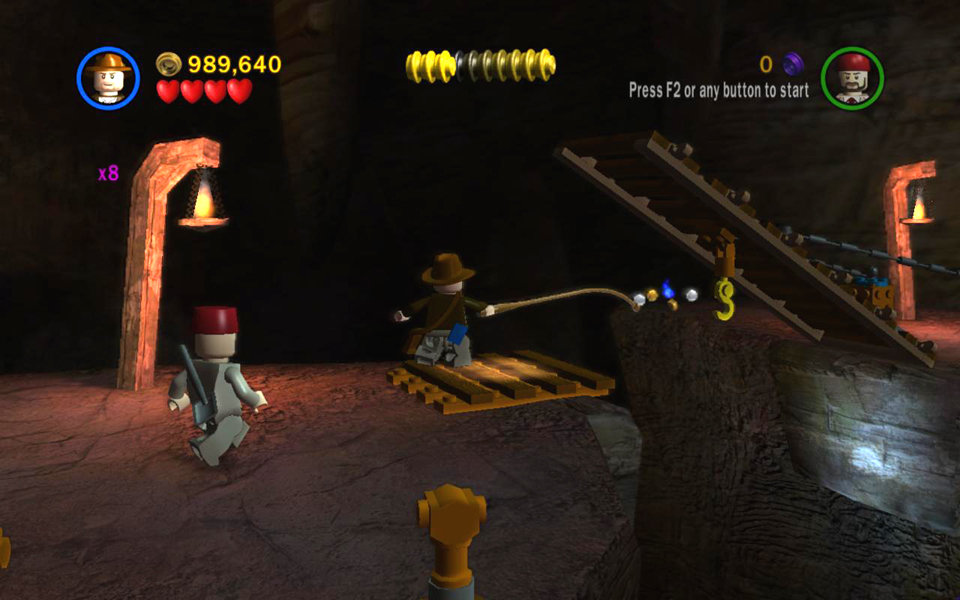 Use Indy's whip to pull down the bridge. |
|
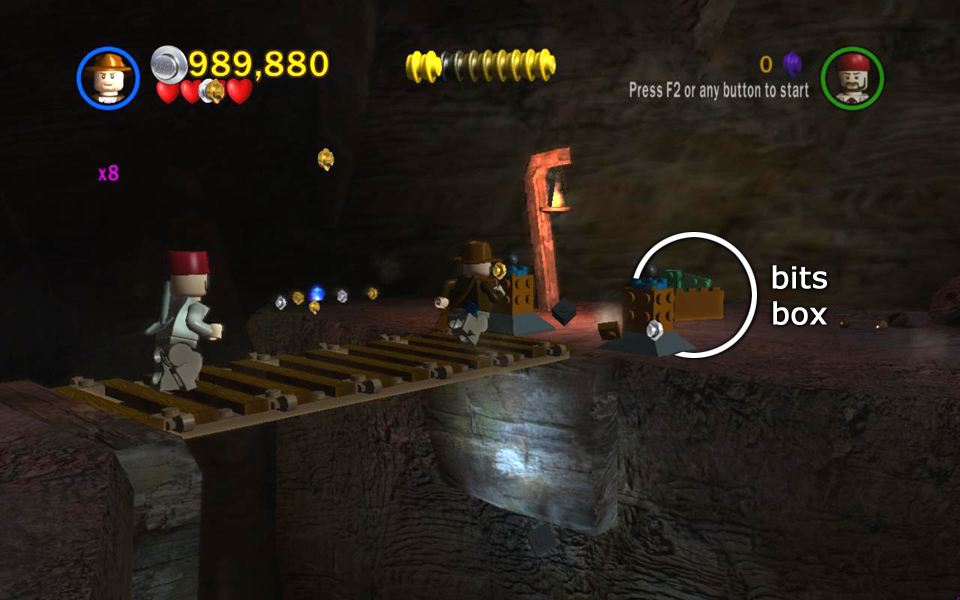 Grab the box of bits on the other side. |
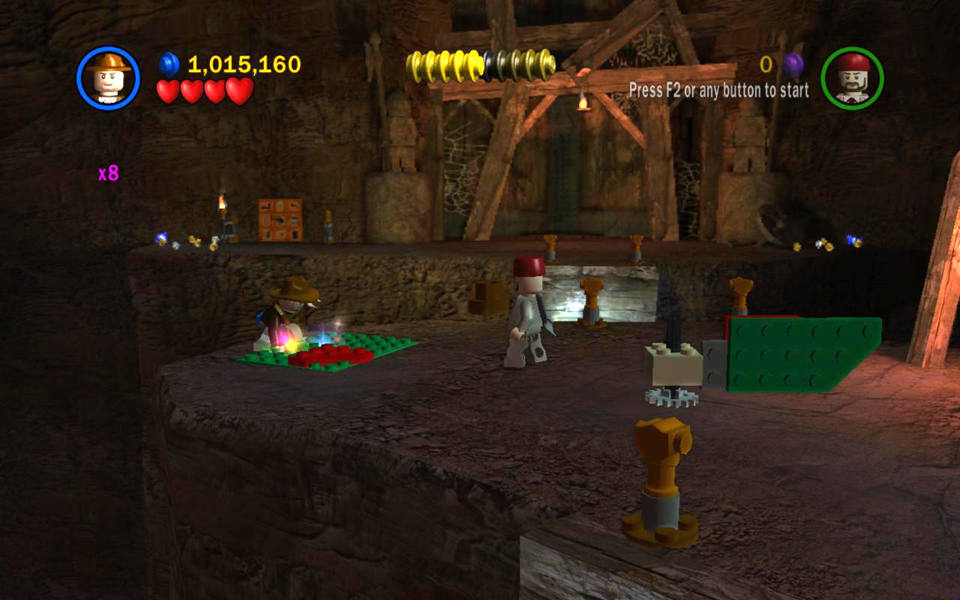 Drop the box on the green plate and use the bits build a spinner. |
|
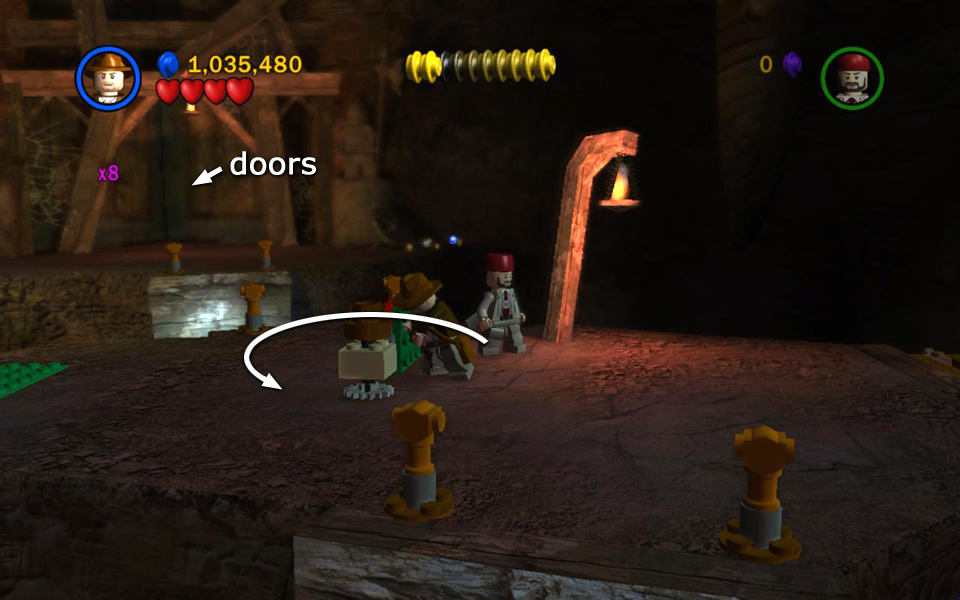 Push the spinner to open the exit on the back wall. |
||
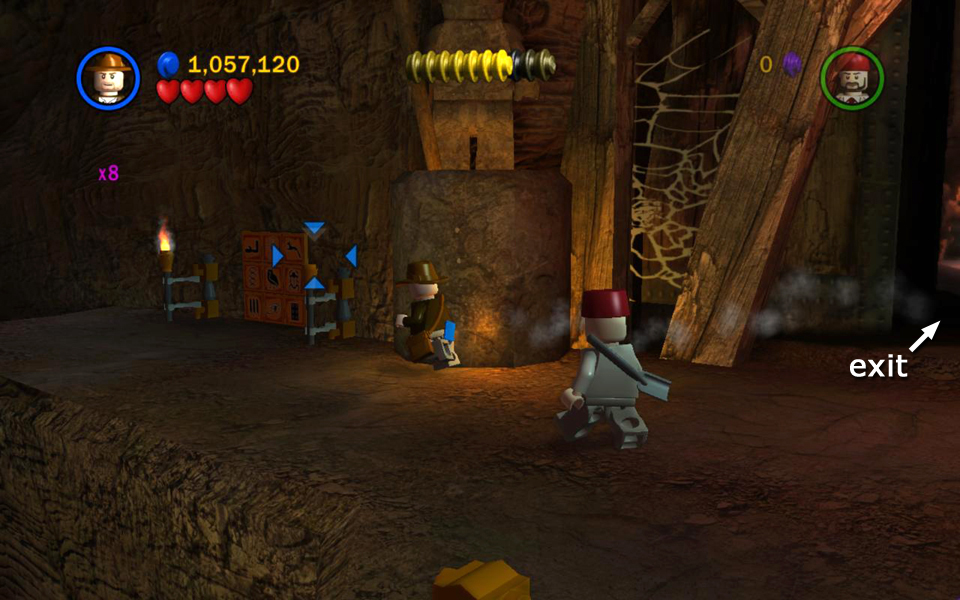
There is another invisible bridge between here and there. But before crossing over, backtrack all the way to the entrance to get the lit torch in the sconce there. Carry the torch across the various bridges back to the exit. Use the torch to light the unlit torch to the right of the hieroglyph puzzle near the exit. This activates the puzzle so Indy can solve it, making artifact piece #10 appear nearby.
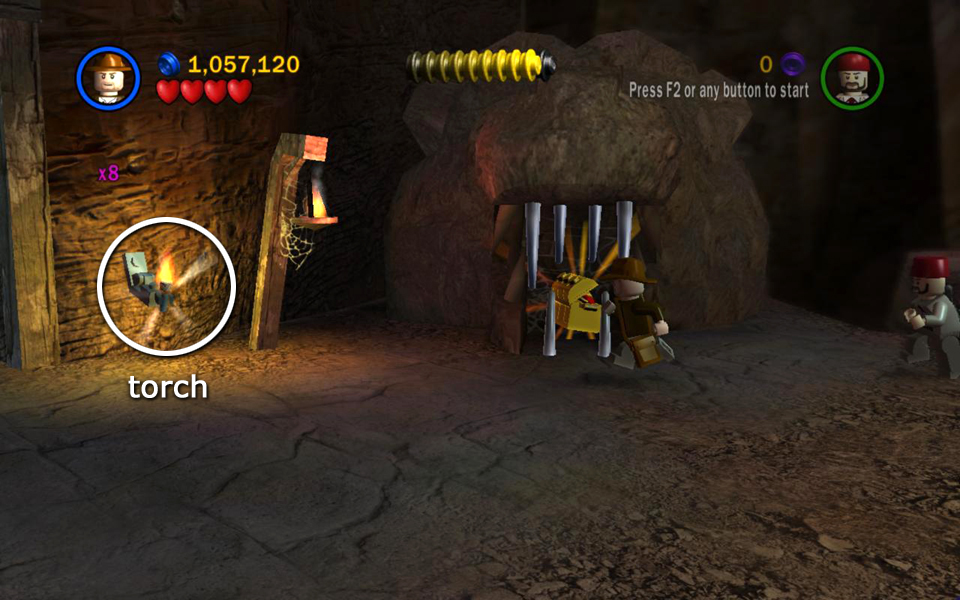 Return to the cavern entrance to get a torch. |
 Use it to activate the glyph puzzle near the exit. |
|
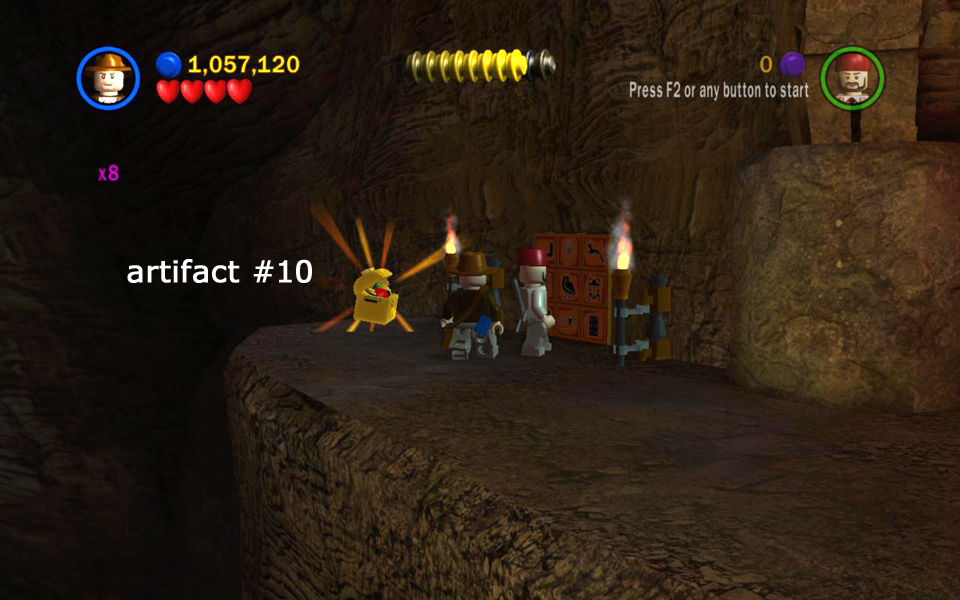 Solve the puzzle to get artifact piece (10/10). |
||
Go through the big doors you opened earlier. Cross one final invisible bridge, picking up a purple stud and various others on the way. Exit through the passageway on the far side of the cavern.
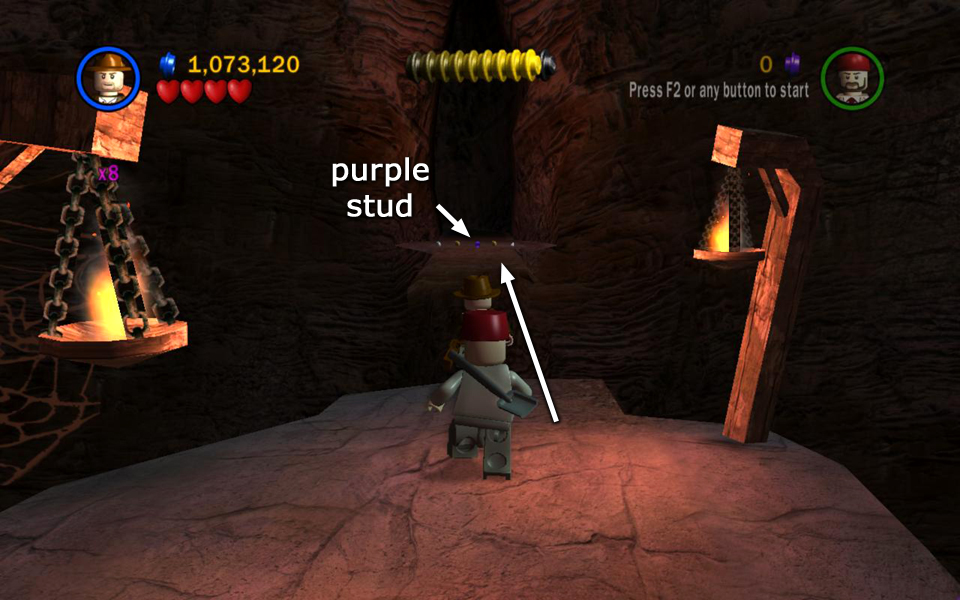 Cross one more invisible bridge and get a purple stud on the far side. |
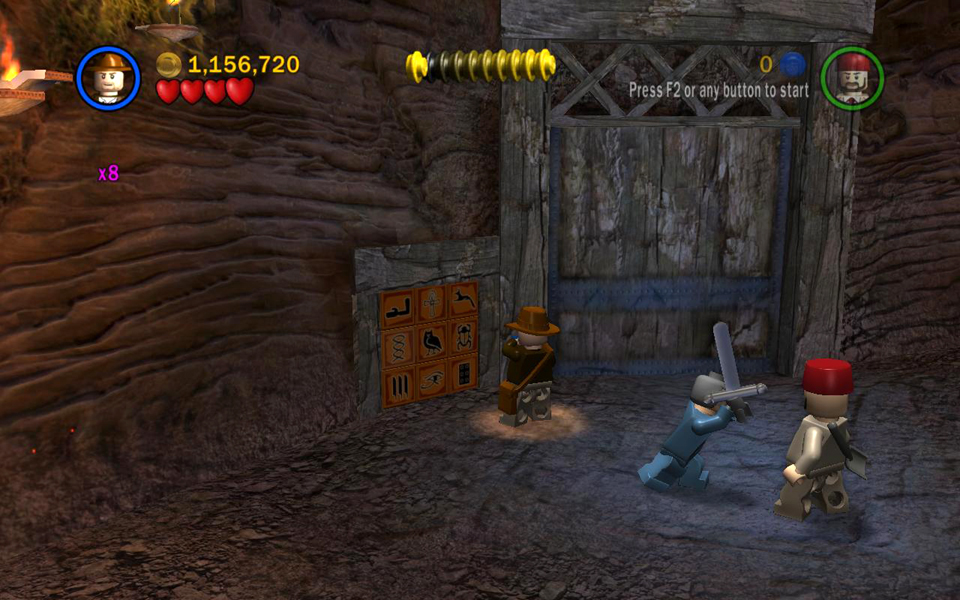
Area 6: The Grail Chamber [jump to top]
(Click any of the screenshots below to enlarge.)
When the cut scene ends, the Grail Knight attempts to defend the treasure he has sworn to protect. You don't actually need to defeat him, though. Just hit him a few times until he kneels to catch his breath. Then he won't bother you for a while. If you're playing a co-op game, have the player controlling Sallah keep him busy while Indy finds the Grail.
Sallah can dig up the handle for the barred alcove on the right. If you place the handle on the blue panel next to the alcove, you can then pull the handle to open the bars. This will enable you to get a few extra studs. All of the grails here are false, though.
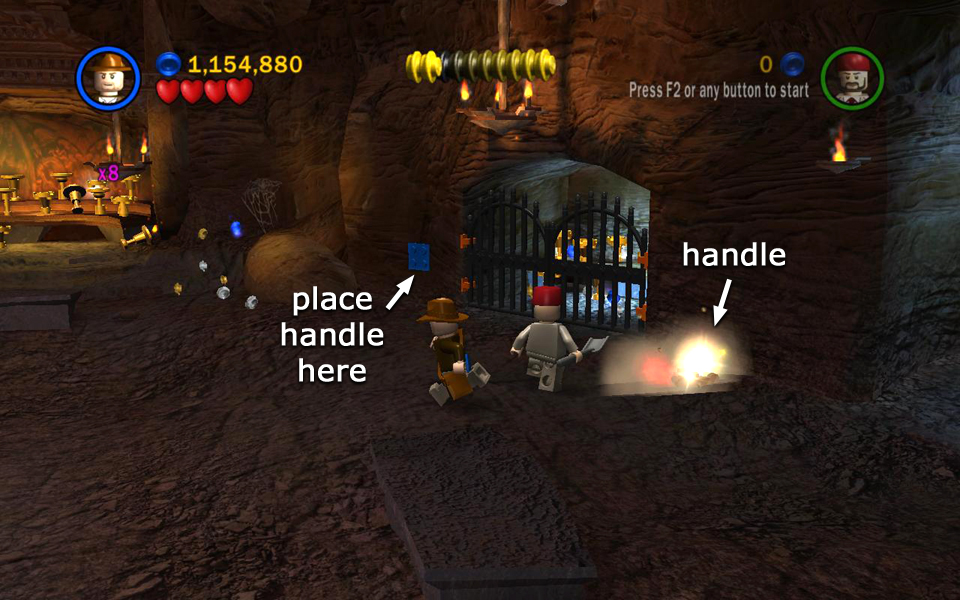 The handle that opens this alcove is buried here, but all the grails inside are fake. |
To find the True Grail, have Indy solve the hieroglyph puzzle on the left. This opens the wooden door next to it. Enter the room beyond and whip swing across the gap. Here you'll find more shelves laden with still more golden cups, as well as a purple stud and some others. The True Holy Grail is the dull, brown one on the bottom shelf on the right. Grab it and swing back across the gap.
Watch out for the knight as you carry the grail to the font of Holy water in the middle of the room. Press the Use button to dip the Grail in the water and end the level and the story. Nice work! ![]()
 Solve the puzzle to open the door next to it. |
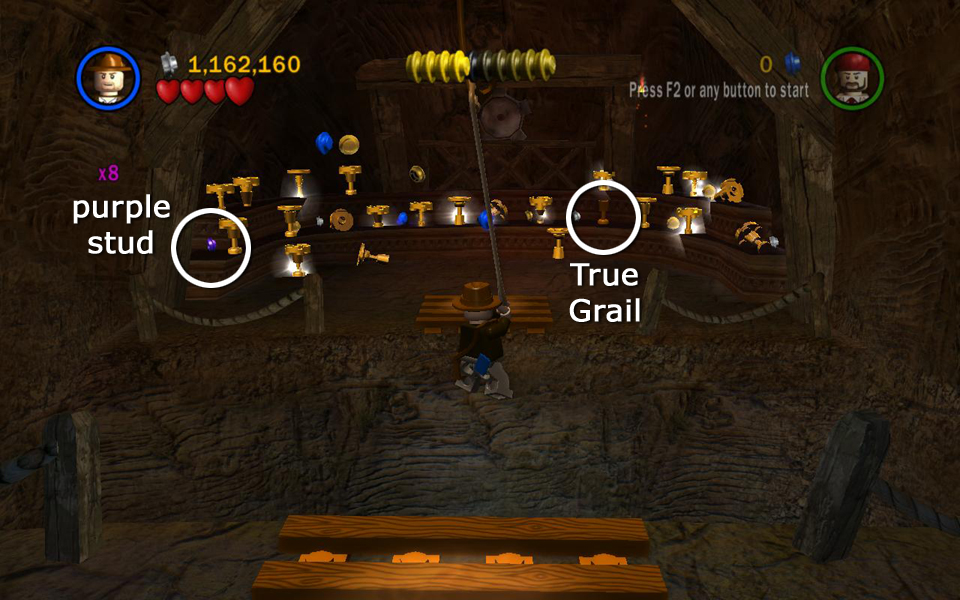 Swing across the gap and grab a purple stud and the True Grail |
|
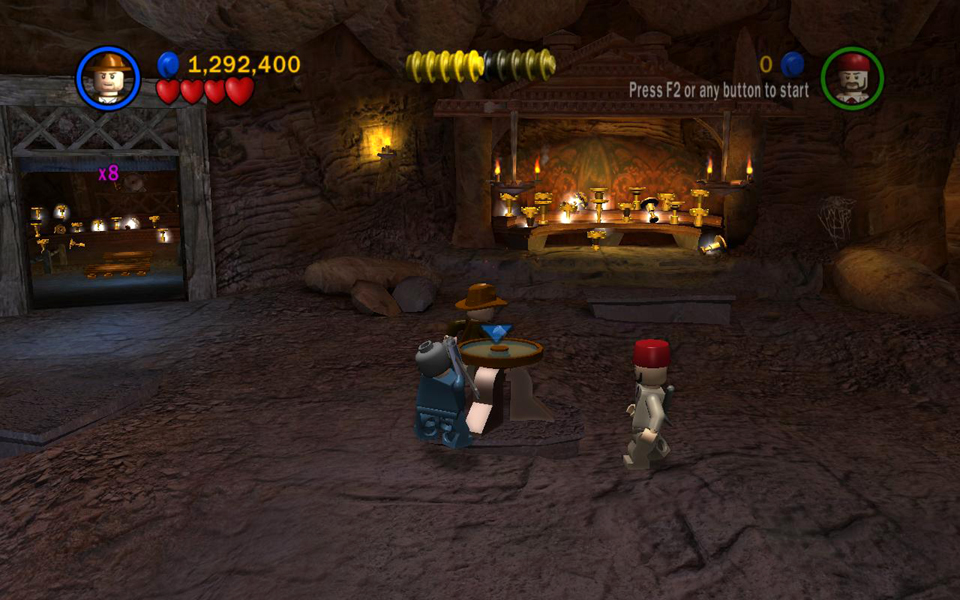 Dip the grail in the holy water to end the level. |
||
| < < < Previous Crusade Level | Bonus Levels > > > |